The Rezistor - building the drivetrain

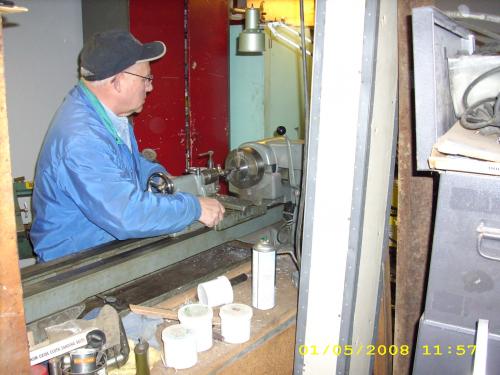
HUGE thanks to my friend Arden for helping me assemble the drivetrain. A fellow member of the Oregon Scooter Club, Arden has an amazing shop with machining and welding capabilities. He probably saved me over $100 in machine shop costs, as well as providing some of the raw materials.
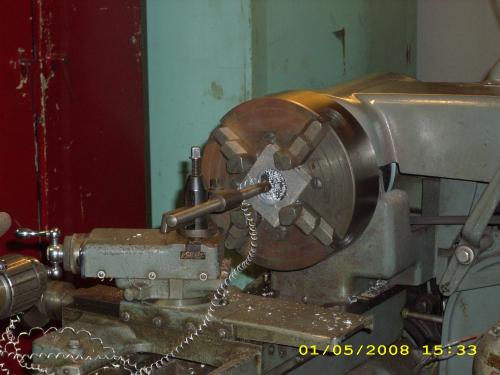
First I had to cut the fat end off the axle (lots of pretty red sparks!). The fat end is normally where the gears go, but I have no need for it and it's in my way. Arden used his lathe to cut a 1" hole in the center of the sprocket so it could fit over the wider ends of the axle. We then machined a steel ring with a 17mm I.D. and 1" O.D. and then cut it in half; this allowed us to center the sprocket on the axle.
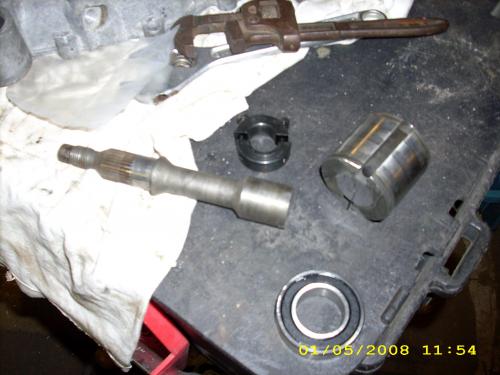
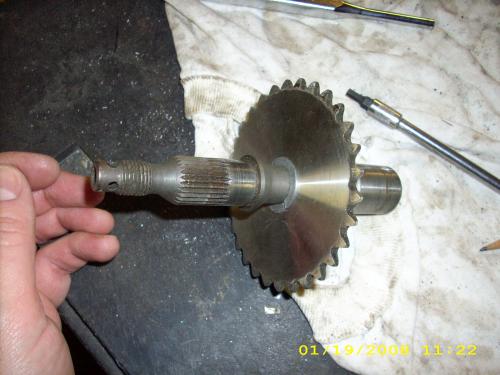

I had to cut a big slot in the V9A engine case near the left bearing to provide clearance for the 33-tooth sprocket and chain. Things were still pretty tight inside the swingarm, so putting the sprocket on the axle was a fairly convoluted procedure. We first had to position the sprocket, then slide the axle through the sprocket and bearing, then attach a split collar that clamps to the 17mm axle shaft with set screws, then fit in the split steel ring between the sprocket and the axle. I adjusted the location of the sprocket to center it in the swingarm slot, tightened the set screws on the collar, then Arden welded the sprocket to the collar and the collar to the axle.

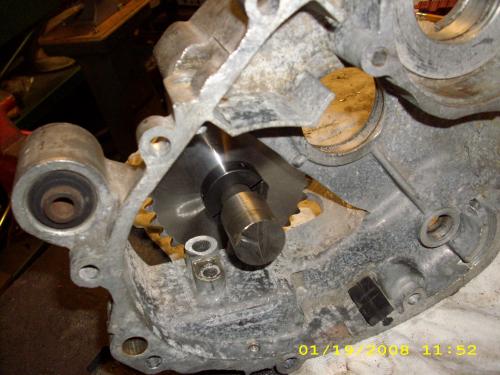
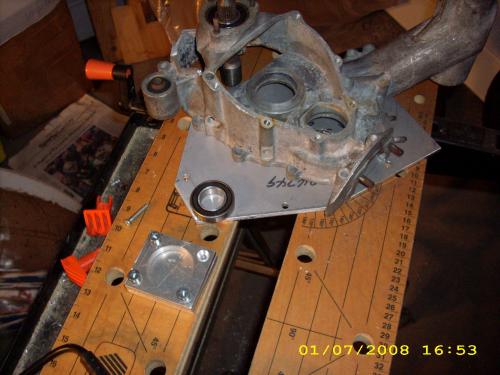
The advantage of using an old engine case for a swingarm is that the front connection to the scooter frame, the rear connection to the shock, and the axle bearing are all exactly where I need them and perfectly aligned. The main disadvantage is that I now cannot remove the axle from the swingarm without cutting the welds on the sprocket (or maybe by removing the left bearing; I haven't tried this yet). Hopefully I picked the right gearing and won't need to change the sprocket. Arden almost talked me into abandoning the engine case and going back to my idea of building a swingarm from scratch (see my previous posts with photos of the wood 2x4 swingarm mockup). I still think this would have been more work, with a lot more welding and potential alignment difficulties. If it turns out that I weakened the engine case too much with all the cutting, I may have to start from scratch anyway.
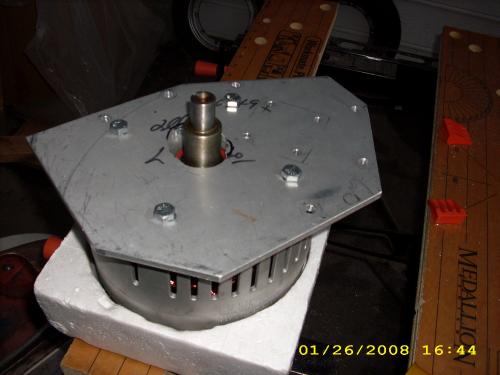
To mount the right bearing, Arden had some 3/8" aluminum plate from which he cut two 2"x3" pieces, then used his lathe to bore a hole in one of them with the same O.D. as the bearing. I needed two plates because the axle stops just over 3/8" short of the motor mount plate. I fastened the plates to the motor mount plate with a screw in each corner, after aligning them using the engine case (which now includes the captured axle). Although I was careful to position the bearing plates such that they were clear of all the various internal bits of the swingarm, I didn't pay attention to where the screws fell relative to the motor, so I ended up only being able to install three of the four screws. Redundancy can be helpful sometimes.
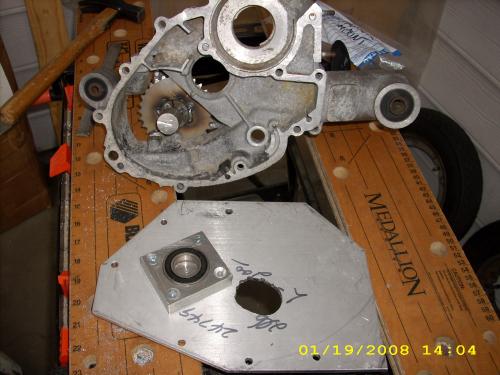
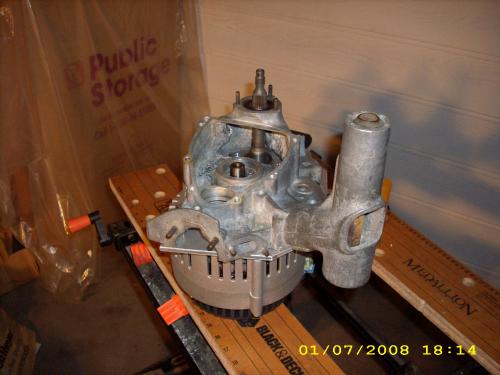
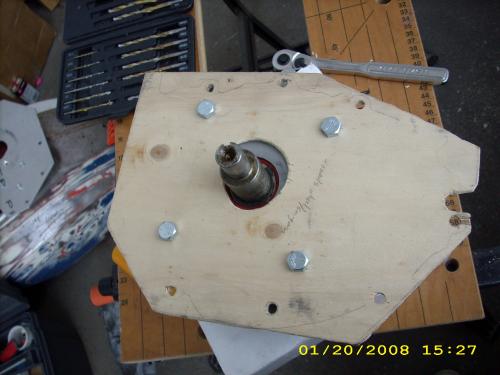
The next step is attaching the 3-phase Etek motor to the motor mount plate using four 3/8" screws into the outer four holes provided in the motor. Positioning is fairly critical, so I first used my plywood template to locate the holes and make sure they were clear of the internal swingarm bits. I fit the chain around the sprockets to check the tension, and discovered I needed to locate the motor shaft a little further from the axle; this required that I cut more out of the engine case (fortunately it's aluminum). I also learned that the 11-tooth motor sprocket will need to sit really far out on the shaft to align with the axle sprocket, so I'll probably have to extend the motor shaft with some of 3/4" rod and a screw into the hole in the center of the axle.
- jstept's blog
- Log in or register to post comments

Who's online
There are currently 0 users online.
Who's new
- Bengun
- Skyhawk 57
- wild4
- justinsmith07
- Juli76
Support V is for Voltage
