
The Cycle Analyst is the coolest add-on dashboard for electric bicycles and scooters. I recently ordered one of the version 2.23 models and while poking around the http://ebikes.ca website I saw this cool looking headlight unit, The Lumenator. I believe strongly that electric bicycles need great lights and so long as we have that big battery pack we might as well have big lights rather than the dinky lights they usually sell for bicycles. The Lumenator fits the bill extremely well, and now that I have it installed I'm real excited about it.
The 2.23 Cycle Analyst is like previous models - largely the same features - it has some incremental improvements and a slight change in the user interface. The addition of the Lumenator is a huge step forward, however.
The Lumenator is available as an accessory you can buy separately, or you can buy it bundled with a Cycle Analyst. I bought them together.
On the Cycle Analyst the biggest improvement is the mounting system. The earlier model had what I thought was a good handlebar mount, but this one just blows it out of the water. The current mount uses a knurled knob you can unscrew with your fingers - whereas the earlier model required a screwdriver. The Lumenator uses the same mounting system. The new mounts are sturdy, easy to install w/o tools, etc. I suppose one criticism may be that easy-to-install means easy-to-remove and it could be a theft target.
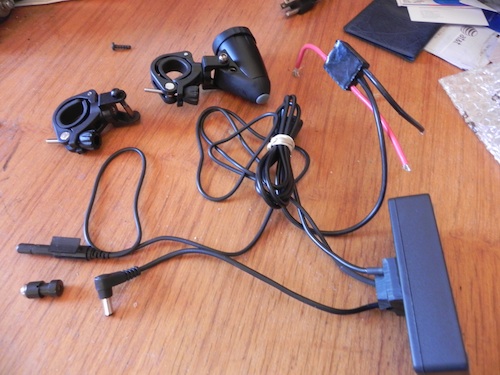
Here's the whole system.
The gizmo towards the top with four wires sticking out of it is the shunt. The cycle analyst does all its measurements and is powered from that shunt. To install it into the bicycle, you attach connectors on those wires matching to the wiring on your particular bicycle. The shunt goes in-line between the battery pack and controller, and measures voltage and current going through the system.
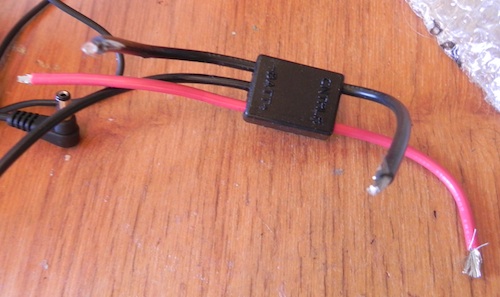
Closeup - It's clearly marked which end goes to the battery pack, which to the controller, and it's color coded to be nigh on foolproof to install. However you'll need to be comfortable enough with electrical tools to crimp together a few connectors.
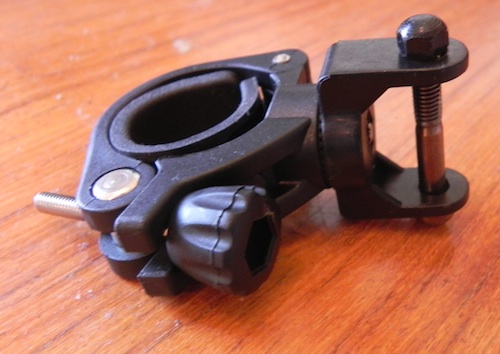
The dashboard mount - The round part of course goes around the handlebar. Note the knurled knob. The rod is a screw which goes through a hole in a mounting block on the back of the dashboard unit. It's adjustable once installed in several ways, so you can adjust viewing angle with relative ease.
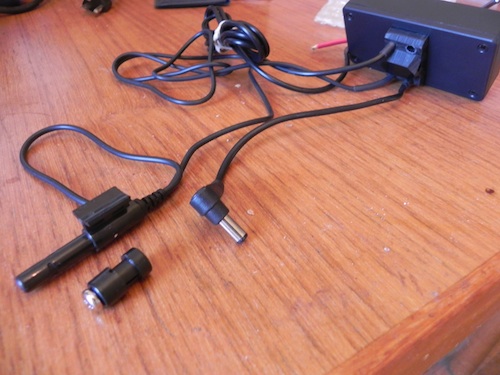
The thing which looks like a power adapter plug is how the Lumenator is plugged in. That wire comes out the back of the dashboard, and plugs into a socket on the Lumenator.
The roundish thing is a magnetic switch that acts as the speed sensor. A magnet, that round thing, is clipped onto one of the spokes. The magnetic sensor is mounted to the fork positioned so it can detect the magnet. The sensor is attached with a pair of zipties.
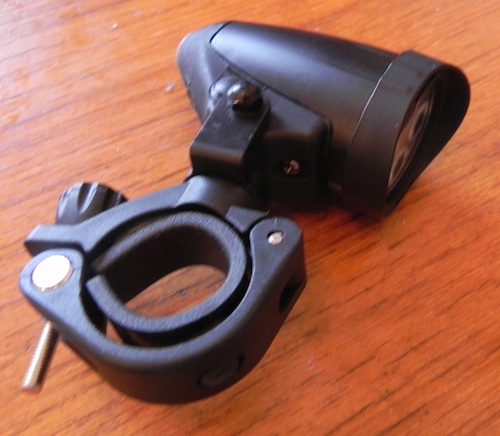
The Lumenator. It's as sturdy feeling as it looks. Very solid feeling, and it seemed incapable of being damaged.
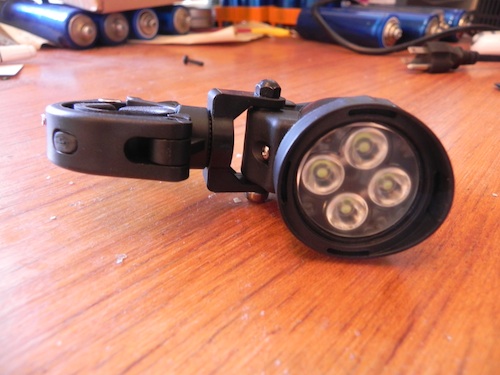
The business end of the light. This is 1000 Lumens from 4x Cree XP-G R4's driven at 750mA, 15-100V AC or DC Input Voltage, 10 Watts Input Power. Hence this can be used with any electric bicycle or electric scooter I can think of. And 1000 lumens - well - that's a lot. This is not your grandfathers dinky LED light. But it also takes 10 watts, so think carefully about power usage.
During operation the light gets hot.
The light housing gets pretty hot, is this normal? It is normal that the Cycle Lumenator housing will get pretty warm when the light is on. Even though these Cree LEDs are remarkably efficient, there is still several watts of heat to dissipate through the housing of the light. In flowing air, the casing temperature will rise about 25°C above ambient, while if the light is left on when the bike is still the casing can get 50°C warmer than ambient. That will feel hot to the touch, but all of the components inside are rated to take these temperatures and more so there is no worry. For best practice, turn the light off when the bike is sitting still, especially indoors.
There is a convenient rubberized on-off switch on the back of the Lumenator
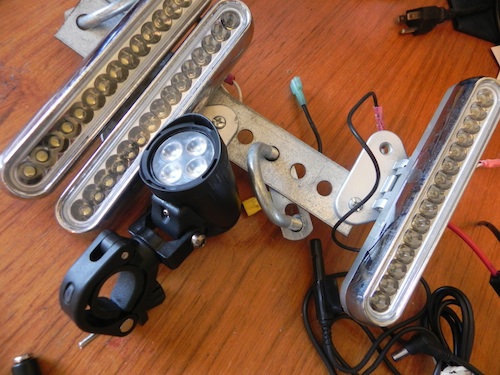
This is one of the reasons I'm so excited by the Lumenator. The gizmo pictured here is what I've been doing in the absence of a legitimate electric bicycle headlight. It was a hack and fortuitously the local autoparts store (Kragens) carries these white LED accent light units. The Lumenator looks so much better.
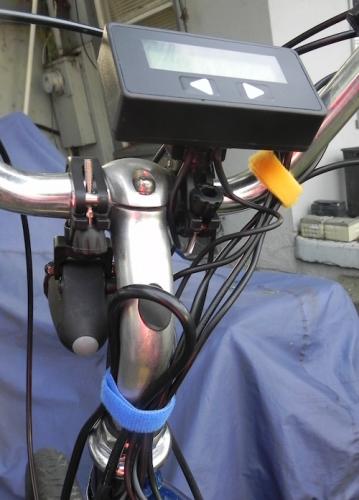
Here it is mounted on my bicycle. The headlight is mounted below the handlebar because of an unfortunate sizing problem. I wasn't able to get these mounts to be tight on the handlebar until they were right next to the stem, where the bar is a bit wider. It was a tight fit and mounting the headlight underneath gave some extra room.
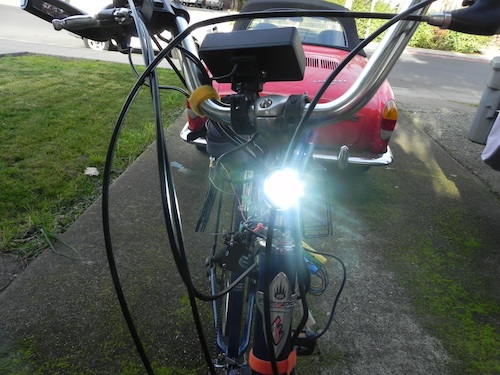
Here, I'm attempting to show how bright the headlight is. I haven't ridden it in the dark yet - will do so in a couple hours and report back.

Taken a moment later with headlight off.
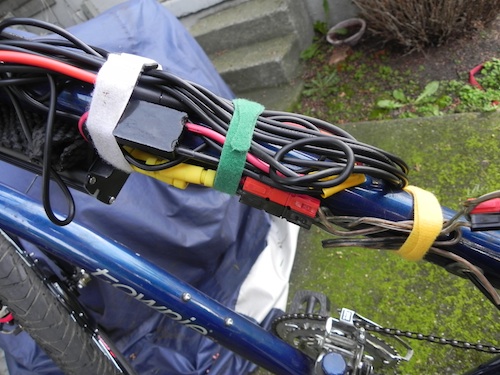
Here's how the shunt looks wired into the system.
Because this is a conversion electric bicycle the wiring is a bit of a hack. The excess wiring just gets bundled up and velcro-wrapped to the bike frame as neatly as I can. However the result is not neat, nor is it waterproof.

