
OK, I woke up this morning and thought is was going to be like any other day.
Then my Google Alert went off. There was a link to a CraigsList ad for an auction that included a Vectrix. It was 7 am. They open at 9 and the auction is at 10:30. It was advertised as not working, but I thought it was worth a $500 gamble.
It took all day, but I now have two in the side yard.
First, I am now curious how many of us have a spare.
Second, I plug it in and get no response. What's the quickest test for it just being a bad fuse or low charge?
-Randy


95% that it't the battery,open it up and hook up a 150 volt dc power supply, or if you don't have a power supply you could hook up (10) 12volt batterys in series maybe 5ah. or open up the good bike and use jumper cables but you would need an (ICL) to protect the controller. or if you have money and I think you do start your nissian leaf conversion now.![IMG_0146[1].JPG](/sites/default/files/u4693/IMG_0146%5B1%5D.JPG) how about that.
how about that.
OK I have (3) bikes but one does not have a title so that's is my spare parts bike.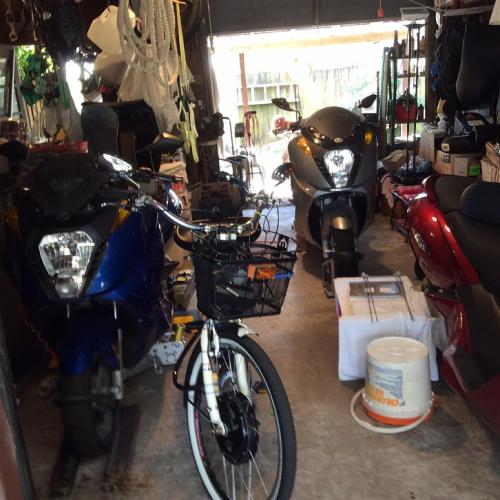 (it's the blue one)
Congratulations, Randy!
I'm on my third VX-1 now, and I've been shocked at how easily it's been to resurrect bikes that have been left for dead. Typically, they have depleted batteries, which can be confirmed with a trickle charger...if you're lucky enough to have one of those. I was able to borrow one from Vectrix at one point, but I had to send it back.
These days I just pull the battery modules (8 or 9 cells each) and use an 5A RC charger (~$30 US) to recondition them. It takes some patience to work through the 12 modules, but that also helps you identify any bad cells. Replacing those is more of a hassle, unless you have spare modules available. I was lucky enough to have plenty of spare modules from my first bike, which had its battery replaced under warranty.
Replacing the main fuse is pretty simple, but you need to check for loose three-phase AC connectors to the motor controller to ensure there hasn't been damage from arcing between the posts. If your MC is trashed, you're looking at a pretty significant investment purchasing a replacement.
HI again RANDY, if your new purchase is BLUE and it's in ORGAN and thay wanted $500.00 I think I have seen it on crieg's list and it does not have any batterys in they have been removed.now this may not be the one but I have been looking at it for over a month.
Congrats Randy, sounds like a deal.
I would check pack voltage, if under 100 or so, external charger may be needed. I use a variac and a bridge rectifier not common for most people.
Another way is to charge the battery in sections, but it is time consuming.
I have 2 VX-1, one conversion I drive and the other a spare.
http://www.evalbum.com/preview.php?vid=1174
http://www.evalbum.com/preview.php?vid=4677
http://mhomoney.blogspot.com
http://Lithiumvectrix.blogspot.com
Wow! Thanks for the qucik replies. I have yet to pop the hood and I work today so maybe not even today. But No one mentioned the fuse, so I assume it is likely a bad (or missing if the bike is blue) battery and I should take the bike apart enough to see the motor controller and put a meter on it. If it is under 90 volts then it needs to be charged. To do that I could jumper the two bikes together when the good bike has been to the red light so it won't stop charging, or just jumper the two together until enough voltage is thru to get this next bike it do it's own charging.
To jumper I need an inrush current limiter, like a 100 watt bulb, first connect both leads on a lamp to the circuit and see the light fade, then connect the two bikes directly and let nature run it's course.
If I jumper them what kind of wire do I need? Jumper cables are for 12 volt cars and yet they are #2 awg. This is 155 volts and a 3 kWh worth of charge, will it need fatter cable or shorter lengths? Or since I am not starting a motor with the power going thru the jumper cable am I fine using something smaller? I am not sure how to limit power going thru, won't any wire turn into a heating coil and melt the insulation?
-Randy
______________________
I also own a 2018 Tesla Model 3 and a 2012 Mitsubishi iMiev
If you connect the two together through the 100w bulb, you could plug the good bike in and charge through the jumper cables and 100w bulb until bulb goes dim and check voltage on new bike, then disconnect jumpers and try the new bike charger and see if it starts. Just another way but you will have to disassemble both bikes.
http://www.evalbum.com/preview.php?vid=1174
http://www.evalbum.com/preview.php?vid=4677
http://mhomoney.blogspot.com
http://Lithiumvectrix.blogspot.com
If it has the ESD charger you should be able to easily access the battery wires going to the charger to measure the voltage as shown below, but make sure the charger has been unplugged from the wall outlet before you begin.
First locate the "Battery" connector on the charger from underneath the headlamp area above the front wheel. It is slightly lower and further back than the "Mains" connector:
Release the retaining clip that holds the "Battery" connector plug in place by pushing the tab in the direction of the arrow:
(If the catch is too tight to release with finger/thumb pressure alone, you may need to use a flat bladed screwdriver to gently prise it open.)
When the clip has been released you should be able to pull the plug straight out of the socket on the charger:
Once removed, the charger output socket can be clearly seen. DO NOT touch these pins with your fingers in case the capacitors in the charger still have a high voltage (especially if the charger had been re-connected to the wall socket since you started):
Holding the "Battery" connector as shown allows access to the Battery (+) and Battery (-) connections shown here:
Set your voltmeter on a suitable scale to measure up to 150V DC and insert the probes as shown:
WARNING:
You are measuring a potentially lethal voltage here so be extremely careful not to touch the metal parts of the meter probes.
If the measured battery voltage is zero, it will either be because the Main Fuse has blown (or a cell failed in an open circuit condition), or because the battery has been left unused for such a long time that all of the cells have been totally drained. (Although this is much less likely).
If there is definitely no voltage across the two battery connections you could possibly risk checking continuity using the Ohms setting on the multimeter to measure the resistance across the two connectors. If the measured resistance is also zero, I would say that the Fuse (or a single cell) had probably failed, and you would then need to remove the battery cover and do some further checks.
However, if you're very lucky, the battery reading will be between 2V and 102V, and will hopefully just need recharging, which you should be able to do from the other bike's "Battery" connector on the charger as shown here:
Make sure the switch is turned off before inserting the wires into the connectors on each bike. When all four wires are fitted and secured with tape or zip ties to prevent them from being accidentally pulled out, you can then switch on and let the charging commence.
The in-line block connectors are fitted to allow voltages to be monitored easily with the voltmeter without having to disconnect, but switching off the switch will allow the resting voltage of both batteries to be quickly measured, but be very careful with the high voltage while measuring.
If it's over 40V I would suggest fully charging your other bike before using it to charge this one through a 500 Watt bulb as you don't want to end up discharging your good battery so low that it too stops charging.
If it's below 20V, a lower voltage on the good bike would be less likely to blow the bulb, but once the voltage is above 40V I would switch off and disconnect the wires from the good bike and refit the connector to allow it to be recharged before continuing.
With a 110V difference between the two battery voltages you will have a maximum of 4.5 Amps current flow, but the current will reduce significantly as the difference between the two battery voltages decreases.
Please note the 500W bulb is probably a bit too much to be used as a current limiter for reconnecting the battery to the controller, but as your battery is already connected to the controller it is only being used to limit the maximum charging current between the two bikes.
DISCLAIMER
If you are not competent to carry out any of the above, or are at all unsure about anything I have written then DON'T ATTEMPT TO DO IT.
The voltages involved here can easily kill you if you get it wrong, and if you follow any of my suggestions and somehow manage to kill yourself, a friend or family member I will not be held responsible for any mistakes or accidents!!!
I have provided the above information for educational purposes only, and I'm not suggesting in any way that you should follow any of my advice, but hopefully it will have given you a much better understanding of how the battery voltage on a Vectrix VX-1 equipped with an ESD charger can be check without having direct access to the battery.
Alan
EDIT: links to photos updated
GOOD advise and great photos and how to do this part.
Good advice already given - hope you can resurrect the bike! Always good to have some spares. I stocked-up on many essentials from the Vectrix liquidation auction last year, but a cheap whole spare bike could be even better, especially if you get it running :)
OK that is some crazy good advice. I unfortunately didn't know how to disassemble the front to get to where you show, so I punked and followed AntiScabs video on the YouTubes. Thanks for that btw, my only comment is you don't mention taking the tiny z shaped body panel off above the passenger footstep. I just finished taking the top off the battery pack on the new bike and was happy and disappointed to find it has 1.5 volts on it. I don't know if these batteries will ever live again. BUT I now know how to take it apart and can do the same to my bike. I am not certain on the next steps:
I have my bike that is mostly discharged, if I go a few more miles it will bring up the red light. I was thinking I could then connect the two bikes and run the charger, this would balance the two batteries during the process of the charge AND it would run the charger until they both were topped up.
It seems like you are suggesting I charge my bike and then discharge it into the new bike thru the lamp. Trying to get the new bike above 90 volts so it will run it's own charger and then use both the bikes internal chargers to do the top balance.
I am guessing the goal with the lamp is to not turn the cables themselves into heating elements, but I don't know the math. You say with 110v difference I will get a max of 4.5 amps, so 110 x 4.5 = ~500, so that must be the 500 watt lamp doing that. How long would it take to get from 1.5v to 40v? Or how long to get the energy out of my bike to the point where I have to unhook it for fear of MY charger not starting again? Math math math... umm if I have a 3 kWh battery and it's a 150 volt battery thats 3000/150, that 20 amp/hours, no? So moving maybe half of that at 4.5 amps would be 2 hours-ish... Wish I actually had a practical use for this in my day to day.
-Randy
______________________
I also own a 2018 Tesla Model 3 and a 2012 Mitsubishi iMiev
1.5V is not bad - means there are no cells that are "open circuit", meaning there is a chance you maybe able to recharge the battery.
The bulb is used as a device to limit the current that will flow from the charged battery to the discharged battery. The bulb has a fairly high resistance, thus limits the max current that will flow given a certain voltage. Since the internal resistance of the discharged battery is fairly low, if you do not use a current limiter like a bulb you will end-up potentially drawing a very large current from the charged battery - that is not only going to heat the cables, it could damage your good battery too by overtaxing its cells beyond their safe discharge current levels. Or at least that's the idea... Think of it this way: if you short the cables off a good 12V battery, you will see serious sparks - you can weld and melt metal due to the very high currents that a strong 12V battery can supply for short periods of time; imagine what 140V can do...
Because you may have some bad cells in the new battery, you should ideally monitor the voltage of each of its cells while charging. That's not possible to do with the battery still in the two large cases that it comes in. Hence, the advice to separate the battery into the 8 and 9 cell blocks and charge each of these blocks separately with an RC charger that you can adjust the voltage of so you get no more than 1.44 or so volts across each individual cell in the block, This way you have to worry only about 8 or 9 cells at a time and can either through the RC charger (if it can charge cells individually) or manually measure each cell manually (if you are charging the blocks in series). With a decent multi-cell charger you can plug and forget - it will shut off when a predefined voltage is reached and it will limit the charging current. Without it, you have to manually monitor that process.
Sounds harder than it is, until you understand the process and do it. I did it on my old battery for a few blocks, when I had to replace one failed cell and the cell next to it that got damaged by the bad cell. Took me a couple of days for that one block to first charge, then discharge with a low-power bench-top laboratory power supply off eBay ($30). This way I confirmed the replacement cells were of about the same capacity as the rest of the cells in that block, plus at the end I top-balanced, and also then discharged to balance with the rest of the battery pack. Then that block was ready to plug in with the rest of my battery (which unlike yours was charged to a certain healthy level - I just had to match that level for that one block that I worked on). You don't just charge to that level - you charge fully, then discharge to that level (otherwise you will not have a well balanced pack to begin with and your next EQ cycle will be long and hot).
Imagine one cell is lower capacity than the rest. You charge a block (or all cells) in series and that one cell fills-up first, while the rest are still half-empty: if you only look at the block's or whole pack voltage, you can't tell if one cells is fully charged while the rest are not - the lower voltage of many empty cells will mask the high voltage of a few full ones. The full cells will begin to overheat and can get damaged if you continue to charge until the rest of the cells "catch-up" - that's essentially what the equalization charge in the Vectrix does - causes damage over time. Ideally you would want to charge each cell individually, but that's to much work. The next best thing is to charge them in small groups so you can identify the bad ones before they fill-up and start to heat-up. Then you can charge the rest of the cells individually to get them to the same SoC, then discharge as a block (again monitoring each individual cell) to see if a few cycles will revive the lazy or low capacity cells... Lots of work, but the alternative is a lot of overheating cells that are "equalizing" while a few slow or larger capacity cells catch-up. OK to do occasionally and for short periods, but in the case of a fully discharged battery where each cell could have very different capacity, it will likely be along process with the potential to cause thermal damage and shorten the life of the good cells, if done at too high a current.
Randy, there's no need to disassemble the front whatsoever, you just need to get low enough to look up under from below the headlamp and if yours has the ESD charger you should be able to see the battery connector on the charger as shown in this photo:
I can remove the plug, check the voltage and refit the plug again in less than a minute, which is a lot quicker than having to remove the battery cover to access the battery directly.
Anyway, at least you have access to the battery now.
Think of it as being similar to jump starting a car with a flat battery. You don't transfer enough energy to fully charge the flat battery, you simply use a small amount of power from the good battery to produce sufficient voltage/current just to start the car. You then disconnect the jump leads to allow the motor to run so that the alternator will continue to charge the flat battery sufficiently so that the car will be able to start again on its own. Over a period of use, the battery should eventually become fully charged again by the alternator, not the jump leads.
With the Vectrix batteries you will only be transferring a small amount of energy from the good battery to the dead battery to bring the voltage up to a certain point where the charger will hopefully be able to kick in and start charging. Assuming there isn't a charger fault, and the battery has become completely discharged due to a long period of inactivity.
It shouldn't take too long to put a small amount of power into the dead battery, it just needs enough to bring the cells up to around 1V each (102V for the entire pack) the intention is not to put 30Ah of capacity into the dead battery, so just part of an Ah might be enough to bring the voltage to the required level for the charger to start charging normally.
Once the charger is able to charge correctly, you can use the voltmeter to monitor the individual voltages of all 34 cells in the top layer throughout the charging process to see how similar the cell voltages are.
If the battery is reasonable, the cells will all be of a similar voltage and the total top layer voltage should be a third of the total battery voltage.
Here are the readings I measured on my battery taken during the first full charge after I managed to get the charger working correctly (The front of the battery is at the top):
I did not remove or dismantle my battery, so I had no access to the two lower layers, but from what I have measured on the top layer alone, I am more than happy that the pack is in a reasonable condition, as the average voltage of each of the two lower layers is 46.6075V (1.3708V per cell) which is slightly higher than the top layer's 46.585V (1.3701V per cell).
All I did with mine was individually charge the two lowest cells on the top layer (and slightly discharge the two highest cells) until they were at a similar voltage to the majority of the other cells. The largest difference I had on the top layer (prior to manually balancing the two highest and two lowest cells) was 0.026V, which I don't think is too bad.
If any of the cells in the lower layers had failed in the short circuit position (which they are designed to do) I would have expected the total battery voltage to be at least 1.37V less than three times the top layer voltage (46.585V), but in my case it was 0.045V higher, which would indicate that all of the unmeasurable cells are likely to be at least as good as the top layer cells.
I would be tempted to use a car battery charger to initially bring the whole pack up to 13~14 volts so you don't have such a large voltage difference between the two batteries.
Also, if you have 110V AC mains electricity, you could possibly use a cheap 20A 1000V bridge rectifier to produce a 110V DC supply from the 110V AC mains which you would then use to charge via the 110V 500W lamp. You would also need to be very careful with all of the high voltage connections to ensure there was no possibility of electrocution.
It could be left connected for as long as was needed to bring the voltage up to the required level, and you wouldn't need to mess around with your other bike either.
It will be interesting to see just how well your battery recovers.
Alan
EDIT: Links to photos updated.
Yesh, just after writing that post I went out and looked again, sure enough both of them are the ESD chargers. I popped the one off my bike and was super happy how easily the connector went back. I did not test it, but I put the new bike back together tonight on the assumption that I am going to charge via that charger port.
My bike was at 2 bars so I am charging it a little more tonight and I will take a length of romex and add an outlet in the middle of one lead that i can plug the lamp into and connect the ends to the two bikes. I will check the voltage every 20 minutes or so on the new bike to see when it crests 100v. But not tonight, it's dark now.
-Randy
______________________
I also own a 2018 Tesla Model 3 and a 2012 Mitsubishi iMiev
Now I am thinking, if the fear is that one battery will be OVER charged by having completed it's charging cycle and that will damage it, won't it's next charge be normal as it is damaged so it won't charge as fast??
Also
Why not just charge with voltage LOWER than the full charge, so that the batteries will charge to that level completely, then when they are ALL at that voltage do the topping off if needed?
-Randy
______________________
I also own a 2018 Tesla Model 3 and a 2012 Mitsubishi iMiev
This is basically what I had in mind:
Although, it might require an in-line fuse and would also be safer to use a double pole in-line switch to completely isolate both the Red and Black charging wires instead of just the Red one shown above.
WARNING
If you try this with 240V mains using a 500W 240V bulb you will have a maximum of 2.084 Amps so it would take longer to increase the voltage to the required level for the charger to work again.
I don't know whether my estimated current of 1.28 Amps @148V battery voltage would be high enough to exceed 148V if it was left connected for too long, and it's probably not a good idea to keep forcing 190 Watts of power into the battery once the target voltage has been achieved, so you would need to monitor the battery voltage regularly to play safe.
240V DC would be even more dangerous than the (still lethal) 110V DC, so be very, very careful if you try this method of battery revival!!!
You should also make sure that you don't have the bike's charger plugged into the mains while you are using this method of battery revival.
Alan
EDIT: Links to photo updated.
Took about 25 minutes to dim the light completely. I hooked the charger back up after measuring 132v on the battery and was unable to get the charger to kick in. I was able to light up the dash which showed dead battery and 8000 miles on the clock.
Thanks all for your help. I guess it might need more charge, I'll check the surface voltage when I get off work, if it is still high I don't know what the next step is, if it has dropped to way under 90v than I will hook the lamp up again for longer.
-Randy
______________________
I also own a 2018 Tesla Model 3 and a 2012 Mitsubishi iMiev
WARNING
Rectifying 110V AC will certainly NOT produce 110V DC!!!!!!!!!!! It will produce more like 190V DC!
My rides:
2017 Zero S ZF6.5 11kW, erider Thunder 5kW
It looks like the charger could be dead, which would explain the very low battery reading if it has been dead for a long time.
It might be worth unplugging the front and rear temperature sensors from the harness and then trying the charger again to see if it makes any difference.
This worked like a charm on mine, but at least my charger would charge slightly for 5 minutes each time I switched it on (before I tried disconnecting the sensors).
With the sensors disconnected and the Laird's firmware installed mine now charges properly again, although it no longer has any battery temperature protection.
I understand that in a no load situation the 110VAC could be as high as 165VDC (110x1.41) when a capacitor is used:
And less than 110VDC without a capacitor.
Unfortunately, I'm not sure how high the voltage would be under the combined load of both the battery and the lamp connected in series (one with a capacitor and one without), so I don't know whether the 110V bulb would survive without blowing if used on a completely flat battery (like Randy's was). However, as there are no capacitors connected across the bulb filament I suspect that it would probably be OK, but as I don't have a 110VAC supply to experiment with I can't be sure.
Under the circumstances, it might be advisable in the interest of everyone's health and safety not to plug anything directly into the mains, well, at least not until it has been proven to be safe to do so.
Alan
EDIT: Links to photo updated.
Rectifying a perfect sine-wave AC Voltage to DC yields AC-voltage times square root of 3 DC-volts when they are propperly smoothed by an appropriate capacitor. That is more like times 1.73. In your setup you have a load on your DC output, which of course lowers the DC voltage.
If you really risk charging the dead battery via rectified 110V AC your battery will be the capacitor.
My rides:
2017 Zero S ZF6.5 11kW, erider Thunder 5kW
OK, I have been running the movement of power from the charged bike to the dead bike for a couple of days, probably connected for a total of 5 hours thru the halogen lamp.
The problem is that although the battery pack now shows 136v after sitting all day, when I plug the charger in I cannot get it to start charging. It is getting power when I plug in. The bike wakes up fine when I turn the key, although there is not a single bar on the charge meter.
Any thoughts on the next step? The next test anyway? Can I plug the two batteries directly into each other now that the voltage is only 3 volts different?
-Randy
______________________
I also own a 2018 Tesla Model 3 and a 2012 Mitsubishi iMiev
So what exactly happens? Do the cooling fans cut in? Does the dash light up? If so, what is displayed on the left hand gauge (Battery Voltage and Temperature or Estimated Range and trip mileage)?
I think that the charger actually monitors the amount of energy it sends to the battery, but as your battery has not been refilled by the charger itself, it will not have registered that any power has been added to the battery, which is probably why the battery gauge is still on empty.
Although the charger does not want to work, now you have a reasonable voltage in the battery, does the motor actually run?
Also, did you try disconnecting the Temperature sensor boards from the main harness to see if it had any affect on the charging?
I don't think there is anything to be gained by directly connecting the two batteries. The present voltage of the battery (136V) should be sufficient to allow the normal operation of both the running and the charging if there were no obvious faults.
If it's not charging now, then increasing the battery voltage is unlikely to have any effect on the charging fault.
Alan
When I plug in the power cord to the wall I can measure voltage at the connector that goes into the charger, but when I plug it into the charger I get no response from the bike.
When I turn the key the bike lights up like normal. I tried to move it an it did intact back out of the space, I was able to accelerate down the sidewalk and it almost made it 3 houses before the red light came on with BATSULT message. I had to push the bike back as it no longer moved by itself.
I plugged it back into the wall, and it continues to have no reaction to that. Should I try changing chargers? Is there a test for the charger working otherwise?
-Randy
______________________
I also own a 2018 Tesla Model 3 and a 2012 Mitsubishi iMiev
Hi Randy,
Swapping the chargers would confirm whether the charger is in fact causing the problem, and should allow you to charge the battery completely and see if the temperature stays within an acceptable range, as it might rise too high if you have some damaged cells.
I don't know whether the ESD charger has a fuse like the Runke charger has but it might be worth having a quick look inside if it's not too difficult to remove the cover.
If the charger is completely dead and unrepairable (and you can't find one locally) you can purchase a replacement from Vectrixparts.com but it would cost more than you paid for the bike (They are currently priced at $603.98 plus shipping etc.).
I think it would be sensible to wait and see how good the battery is first.
Alan
Yup, swapping the chargers will show if there is another issue. Not too hard to do but takes a couple of hours to swap the first time, though I can probably do it in under an hour now... The ESD does not have an easily replaceable fuse like the Runke charger. Fuses on the ESD are soldered inside. And opening is a bit of a hassle - it is caulked with silicone and requires some perseverance to open, then re-caulking to seal to waterproof it when you close it.
If you have access to CANBus adapter and Scooter Diag software, see if you can gain some more information or reprogram the charger before swapping hardware - might just give you some clues.
Since I don't have a canbus adapter I don't have a way to upgrade or even run scooterdiags. I know my bike has the 68 MPH upgrade done, will putting that charger into a bike that might NOT have had the upgrade done cause problems?
I own a hybrid from Honda as well. I have been thinking about putting a Grid Charger on it. Something to keep the batteries top charged, like the bike can do when it hits red light. The grid charger charges to 144 volts very slowly. Does this sound like a good solution to bring bike packs back to life too? I might be more motivated to buy it if I could get double use out of such a device.
-Randy
______________________
I also own a 2018 Tesla Model 3 and a 2012 Mitsubishi iMiev
Is your good-charging old bike with the older 62mph setup and the new non-charging bike with the new 68mph limit? If they are both on the 68mph limit, you should be OK swapping.
Even if one is 62 and the other 68, while I can't say with 100% certainty nothing will go wrong for you (read - you're responsible if it does go wrong), my own experience is that you can mix and match to some extent. I ran ESD charger firmware that was supposed to match the 62mph Motor Controller firmware with the 68mph MC firmware installed. The only issue if I recall right was the fuel gauge was misbehaving. But the bike ran and charged fine.
As for the Honda grid charger, I've thought about that too - I too have the '11 Insight. I'm not fully convinced the Honda needs it, so I have not bought it. The folks at insightcentral.net forums might be of more help, though from what I read, no one there actually is an expert enough to tell for sure. Yes, you could use it to equalize the Vectrix pack as long as it supplies something like 1-2A. 3A I think is a little too much - causes more heating than I think is reasonable. Keep in mind that the grid charger in the car application activates the battery pack's cooling fans. Same as the original VX1 charger - if your fans are not working due to a bad charger, you would need to find a way to turn them on during the charging process. You may overheat the battery otherwise, especially during top balancing. If you do it at 1A it might be OK without fans, but anything over and it will heat-up unevenly and possibly too much for its health.
So if I put a 144v grid charger on the Vectrix it would not top balance as the battery can take more voltage than that. I was thinking it would bring the pack to 144 volts which is higher than I have gotten it with my current charing off the old bike trick.
-Randy
______________________
I also own a 2018 Tesla Model 3 and a 2012 Mitsubishi iMiev
I think 144V is almost reasonable for top balancing charge. Laird's custom ESD software goes to 146 if I recall right. That's 0.02V difference per cell - not sure if it is a significant difference with 144V - I think the cells begin to warm-up and be reluctant to charge more around that level. The OEM 156V or whatever the target on the display is, is way too high and will overcharge the batts. You got to dig-up my old thread for when I was troubleshooting an ESD charger and a battery last year - there I listed some per cell voltages that I determined were "full" level. If memory serves me, these were at 1.44V, exactly what Laird's software comes-up to from 146V for the pack. I was using 1-1.5A constant current for several hours to top balance a pack of 8 cells in series. The cells leveled up at the 1.44V each and then all the current was used up and dissipated as heat. I'll try to find that thread to make sure I got my numbers right.
OK, so I had to give up last week as vacation approached. I had the bad bike at 132 volts detected at the charger cord going to the batteries. My next step was to swap the good charger between the two bikes. Did not get a chance as I didn't have a 16 inch philips head. Have one now. But this morning when I went to test the voltage in the bad bike, it is now reading at 14 volts, not 132. Despite having sat all day while I was at work and still measuring well over 100 the bike seems to have lost much charge, like the surface charge went away and I had only moved a little bit of electricity to the bad bike.
So I have recharged my good bike and ran the cable thru the lamp again. Instead of a few hours I will leave the bikes connected all day and see what can be done. When the lamp doesn't have enough volts to light, it is still letting electricity pass, I just don't know how long I should have them connected. Wanna just make sure before the energy it would take to swap the charger between the two bikes.
-Randy
______________________
I also own a 2018 Tesla Model 3 and a 2012 Mitsubishi iMiev
Pages