Submitted by Gendronw on Tue, 05/26/2009 - 08:47
Hi There !
I finally bought my new batteries ! I bought them at my local "batterie Expert" store for 39.99$ each. With the 5% discounts I found in a newspaper, the four batteries cost me 170$ including taxes.
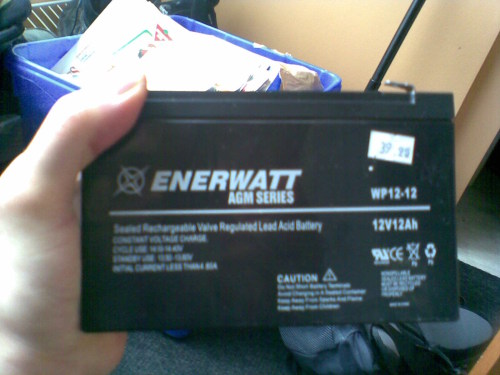
new 12v/12ah battery !
Submitted by Gendronw on Sat, 03/14/2009 - 18:13
Hi folks !
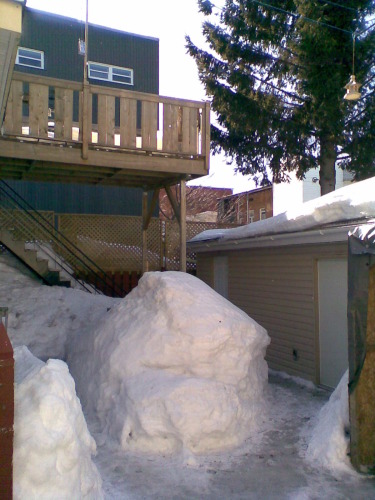
I am sorry I did not post anything new since a long time. My batteries died and winter arrived, so I was not in a mood to write anything new. But now spring is at our door ! There is still a lot of snow outside, but in a month or two I should be able to ride my Ebike Again !
Here is a picture of my backyard:
The little story of my batteries
Submitted by Gendronw on Sat, 11/01/2008 - 09:38
Rather that being a step by step "how to", this blog post is more of a resume of how I repaired my XB-600 motor after the wires were cut.
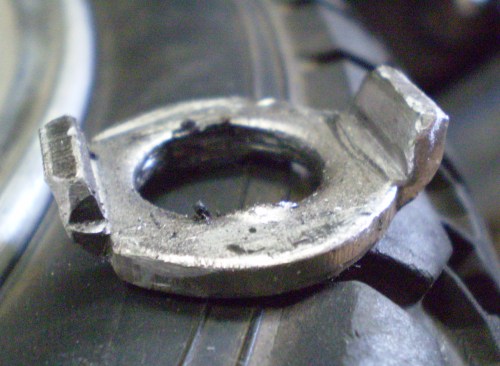
When the axle spun, my tab washers were damaged on the inside....in fact, the tab washer did not moved ....the motor axle as spun in the tab washers too.
Submitted by Gendronw on Sat, 11/01/2008 - 07:17
I managed to mount the motor on the bike so I was ready to get key in and try it ! So I went outside, put the batteries in and then it worked ! But only for a few feet. After 1 second or two the power would cut off. I was not sure at that time what was the problem, so instead of dismantling the bike again, I just plugged in the charger. After about an hour charging the bike, I went outside for a second test...and it worked ! I was able to ride a bit around the house. So I plugged it in again, for about another hour.
Submitted by Gendronw on Thu, 10/30/2008 - 09:00
So I finally received the parts I needed to fix the motor on my bike frame. Dealing with Extreme Support on that issue was a pain.
First, when they sent the motor, there were no spacers, nuts and tab washers. I asked Extreme for parts : "needed to fix the motor on the bike frame". They sent me part number "XB600-160R" Rear Break Assembly.
Submitted by Gendronw on Sun, 09/21/2008 - 12:42
This post will probably be the biggest one. Plugging everything was the biggest challenge. I managed to reconfigure all the Wiring to get everything to work, using the wiring diagram provided by Milleym (http://visforvoltage.org/forum/3712-xb600-wiring-diagram-groovy). Since my old luyuan bike had two 48v battery pack, I wanted to plug them in parallel to be able to get more amps to the motor. Here is how I did that.
Submitted by Gendronw on Sun, 08/17/2008 - 14:59
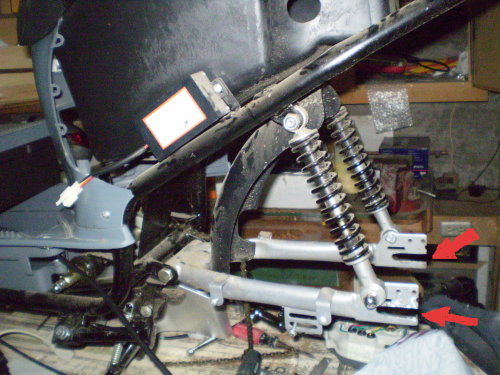
Fitting the new parts on the bike was a big job. The shaft on the new motor was too big for the frame and the new speedometer required some plastic cutting to be able to fit it in place.
To be able to install the motor I needed to grind some metal of the frame. I used a high speed rotation tool similar to "Dremel" and it worked well ! Now the motor fits in !
Submitted by Gendronw on Sun, 08/17/2008 - 12:19
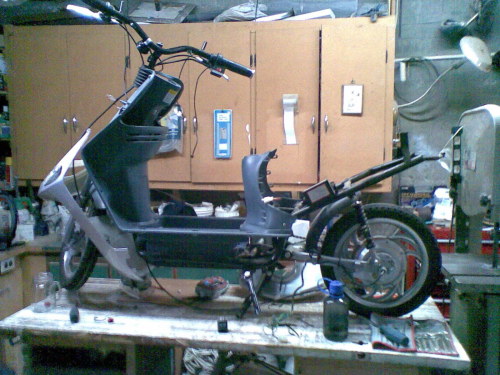
Dismantling the bike was an easy task. After getting the batteries off I Unscrewed everything. Now the bike looks like this !
There was a series of wires that were running from the back(where the controller is) to the front of the bike. I put an identification on every connector before disconnecting them.
Submitted by Gendronw on Sun, 08/03/2008 - 17:41
Getting the new parts was not easy. I sent emails to Website like freeenergystore.com, e-ride.ca, daymak.com and ebikes.ca without success. They all said their parts where not made for this kind of ebike. Then I found the Xtreme website, the xb-600, and Visforvoltage ! After a few emails with Xtremes I ordered a xb-600 motor, controller, speedometer and throttle directly on their onlinestore. Total price for the parts : 260$ but their Shipping to Canada is extremely costly !
It cost me 130$ for shipping to Quebec city plus 60$ for customs fees ! So about 450$ Total !
Submitted by Gendronw on Sun, 08/03/2008 - 14:05
Hi to all members of the Visfovoltage community !
I'm on a big project right now, and I want to share it with you. It's not over yet, but I'm working Hard to get it done.
I bought a Used 48V Luyuan Bike that look very similar to the XB-600. The Bikes worked for about half a kilometer before it dies completely. I knew the bike was broken, and I wanted to make a better bike by buying parts over the web.


