The Rezistor build continues

I haven't blogged in a while, but it's not because I haven't been making progress. It's just that when I get free time, I'd rather spend it building than typing and uploading photos. Here's a summary of what I've been doing:
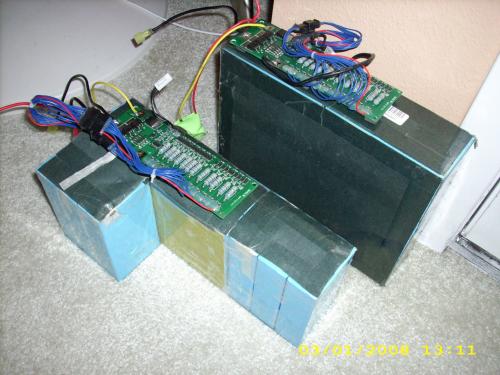
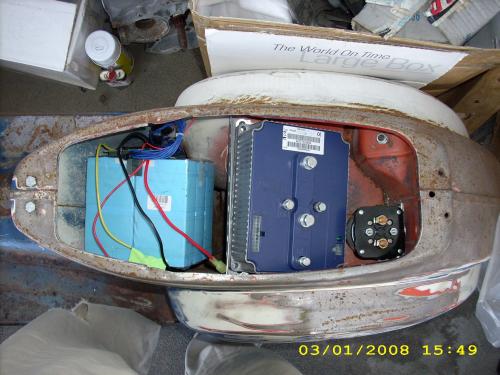
I had to reconfigure LiFeP04 battery pack 1 so it fit better in the space below the seat. This involved cutting the tape that held it together, cutting and resoldering some of the links between the cells, and extending some of the wires to the BMS.
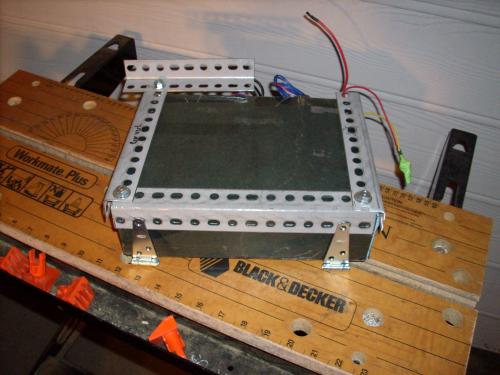
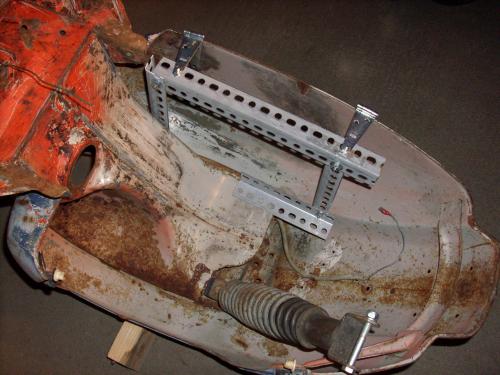
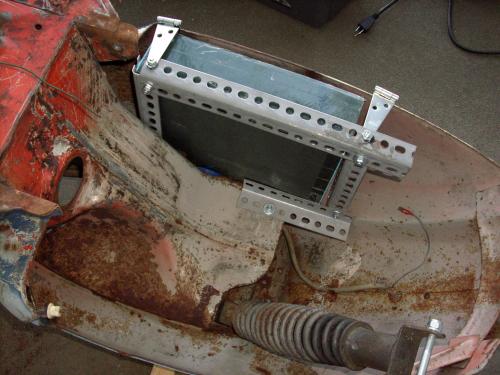
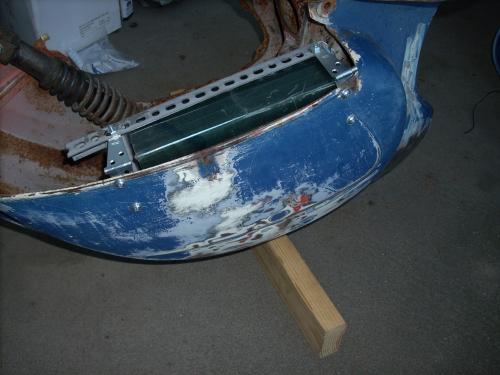
I got some perforated angle, some hinges, and a bunch of nuts and bolts, and built a rack for battery pack 2 under the left cowl. Originally I was thinking this might have to be welded to the body, but I don't weld, so I ended up drilling some holes in the body. I don't think it looks too bad. It sticks out a bit underneath, but still looks better than an exhaust pipe.
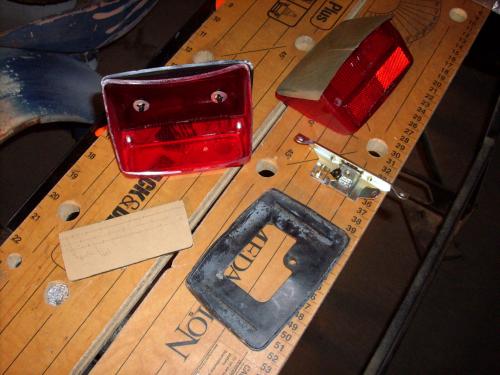
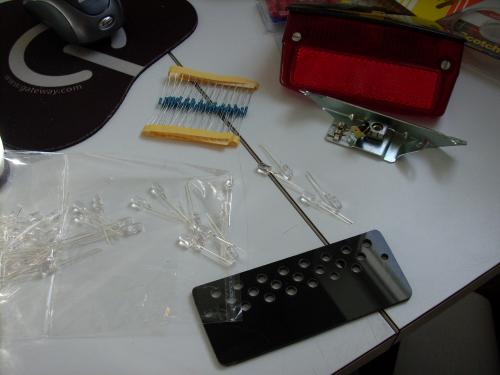
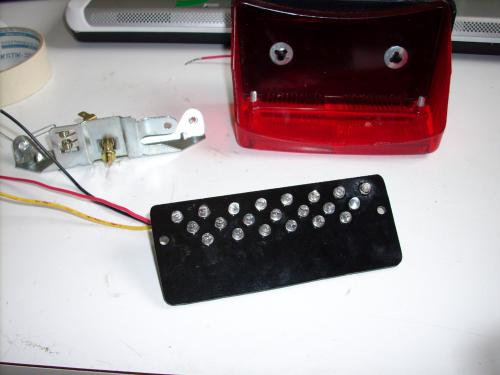
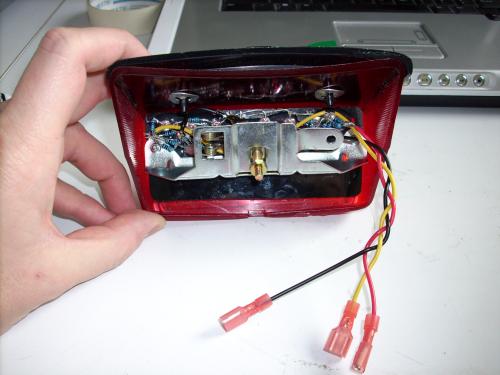
I took apart the taillight and replaced the tiny bulb (it didn't have a brakelight) with some LEDs mounted in a piece of acrylic. It screws in very nicely to the existing taillight mount. I wired a couple of resistors in series with a bypass so it functions as a brakelight as well.
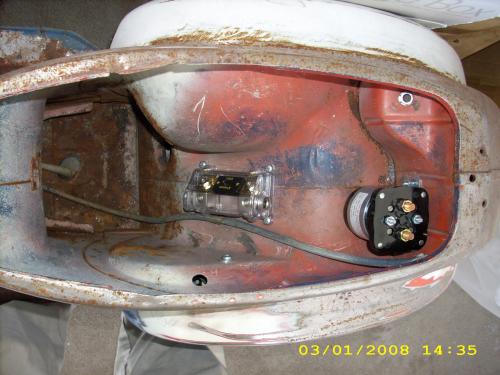
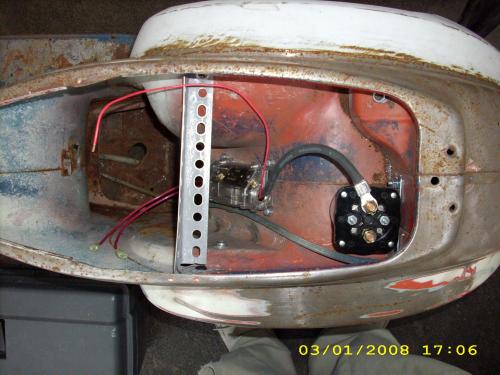
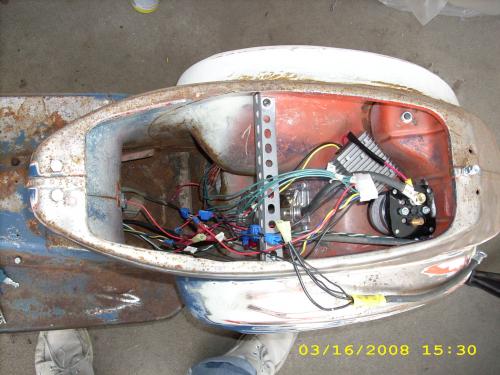
I figured out places to mount the main components. The main fuse holder, contactor, and 12V converter are screwed directly into holes I drilled in the body. I had a piece of angle left over from the B2 mounting, so I screwed that to the body where the fuel tank was, and I'll bolt the controller to that. B1 fits pretty well right in the space in front of that, and I don't think I'll need to build any special mount, maybe just a big rubber bungee to secure it to the angle.
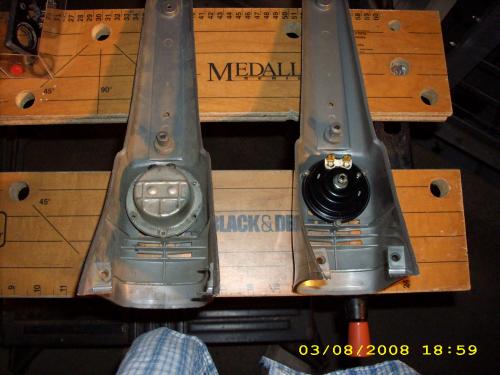
The old horn runs on AC, so I bought a new DC horn from electricscooterparts.com (interestingly they are in Boulder Creek, CA, where my mom lives) as well as a keyswitch. The Chinese horn was much less expensive than a DC Vespa horn. I cut some notches around the edge of the horn so I could secure it into the horncast with screws. The previous owner gave me a new horncast along with the old one, so in the photo you can see the old on the left and new on the right.
The brake parts I ordered from Ptown Scooters finally came in this week, so I was really glad to get those. I'm reusing the original front and rear drum brakes, so I needed new cables and rear shoes. As I mentioned before, this scooter never had a brakelight (or turnsignals, or speedo...) so Steve at Ptown found me me some brakelight switches that install in-line with the cables, and I think these will work out nicely. Thanks, Steve!

I got the missing bracket for the center stand, so I finally installed that. This makes work a little easier. I also got bolts for the seat attachment.

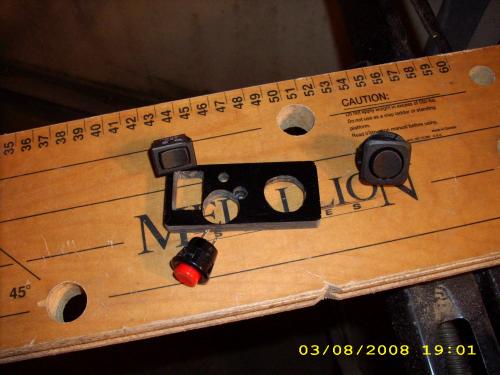
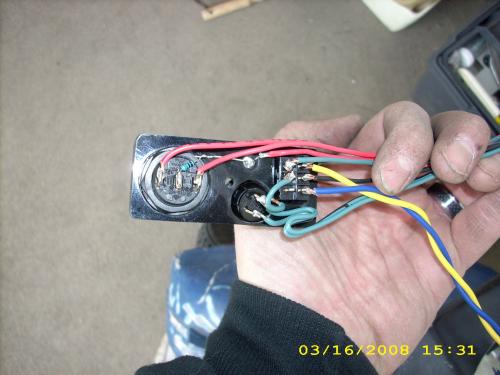
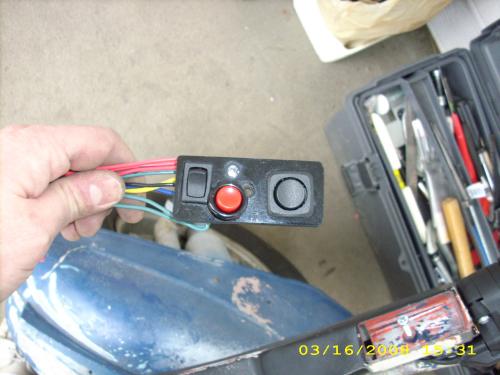
The old switchpanel was a mess, so I built a new one out of three layers of 1/8" black acrylic that I superglued together. The rectangular rocker switch on the left is for forward/reverse, the round rocker switch on the right is the turn signal, and the red button is the horn. The LED blinks red along with the turn signal. I bought the turn signal blinker at an auto parts store.
Most of the rest of the work is wiring. Today, using an unbent coat hanger, I pulled the rear brake cable through the wiring channel in the body, along with several wires for throttle control, forward/reverse, and lighting (including white LEDs for reverse, the housing for which I have yet to build). Pulling the wires was a total PITA; I'm really glad that's over.
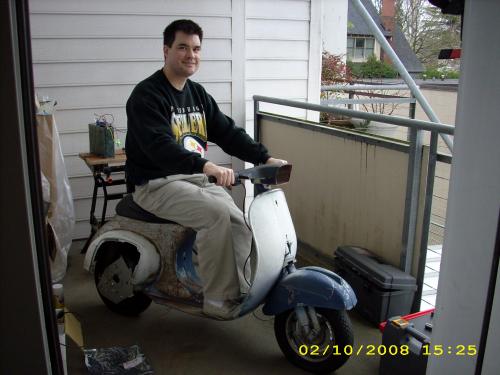
Yes, still ugly. And the Vespa doesn't look so great, either. I've realized at this point that this is really going to be two projects: the conversion and the restoration. I've never done a scooter restoration before, so I'm not really sure how far I'm going to carry it. I suppose it depends somewhat on how much fun it is to ride when I'm done.
Oh, and I got married. Huge thanks to my lovely wife for her continued patience and support as I finish the project!
- jstept's blog
- Log in or register to post comments

Who's online
There is currently 1 user online.
- fatherchuck53
Who's new
- eric01
- Norberto
- sarim
- Edd
- OlaOst
Support V is for Voltage
