
I've been neglectful of posting updates on building my car. Lame-Excuse: I wrote a book this spring ... It's been a busy time. Anyway, the book is finished and the car is working though with some details still to work out. I'll be at the Silicon Valley EAA EV Rally with the car this weekend for those of you in the SF Bay Area who might want to drop by and take a look.
This set of pictures concerns mounting the controller and closely related components on a heat sink. It doesn't show how the heat sink is mounted in the car, nor some other stuff. I'll get to those soon.
The car has a Netgain Impulse9 brushed DC series wound electric motor bolted directly to the VW transaxle. This means I'm using the VW transmission, and I normally start in 2nd then upshift to 3rd and maybe 4th if needed. The car seems to be more efficient at higher speeds when I upshift.
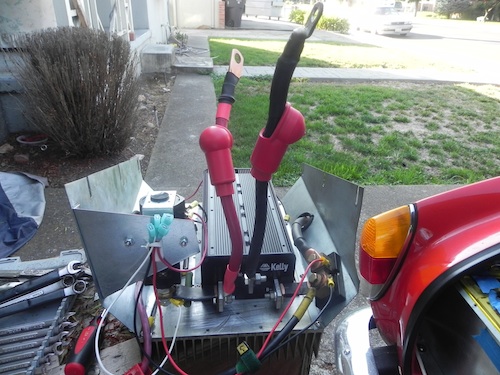
The heat sink shown here is mounted between two of the battery boxes and it looks awesome when mounted in the car. But as I said that'll be a future report.
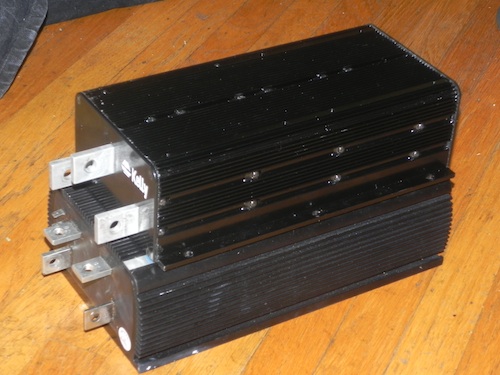
This is the KDH14800D sitting on top of a Curtis 1231C - for size comparison. I am likely to be selling the Curtis controller before long, but I have it in my possession as an option should the Kelly controllers not work out. I'd bought a KDH14800D over a year ago and that one was a lot smaller than this one. Unfortunately that version of the controller blew up (as in - plasma ball) and Kelly was kind enough to give me a good deal on a replacement. This newer larger KDH14800D is the replacement.
It's rated for 144 volts and up to 800A. For Kelly their controller rating is the peak current, so this controller will handle 800A peak (for some short time period) and something like 300A continuous. The pack is 144v 100AH of thundersky LiFePO4 which are rated for approx 3C max discharge. Hence this size of controller is about right for the pack. Kelly sells larger (and smaller) versions of the 144v controller but I chose the 800A version as a tradeoff between heft and cost.
Kelly also sells (now) a controller for series wound brushed DC that does regenerative braking. I thought real hard about getting that as the replacement controller, but their biggest model is rated for fewer amps than this one.

Back side of the controller.
They're still using spade connectors .. and their pseudo-RS232 for connecting laptops.
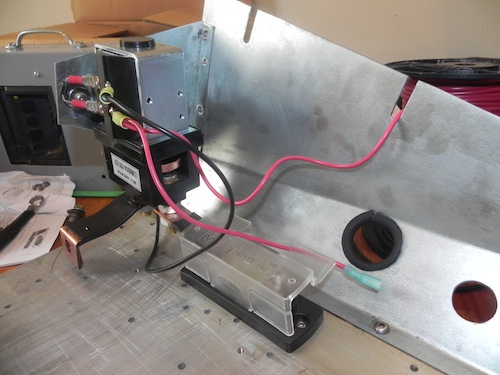
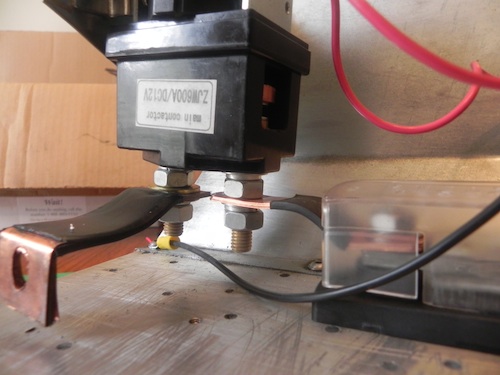
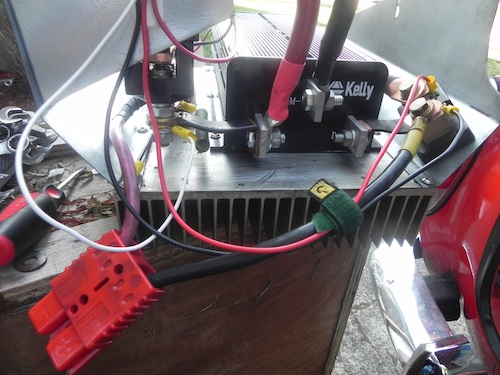
This shows the fuse block & contactor as well as some of the heat sink and mounting brackets.
I got this fabulous deal on a huge heat sink on eBay - $30. It's big enough for the controller plus mounting related components ON the heat sink. Plus these controllers can get pretty hot so it's helpful to have a heavy duty heat sink to wick away the heat.
The heat sink is the gold tinted thing at the bottom, and the mounting brackets are the stainless steel things at the top. We made a bracket to mount the contactor to the mounting bracket and are using copper straps between some of the components.
The advantage of putting all the components on the heat sink is the connections between everything is real short. We got lucky this time around that everything was close enough together to use the official thundersky copper straps that are meant to connect cells together, but instead use them to connect components together. Shown here is a strap from fuse block to contactor, and another from the contactor to the B+ connector on the controller.
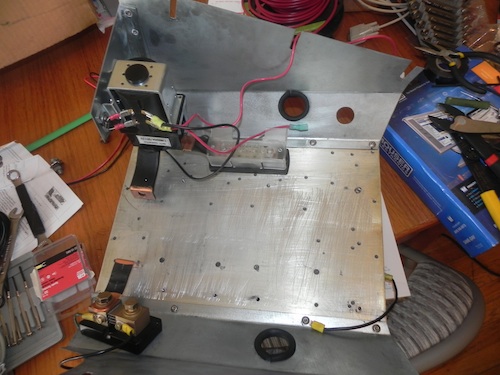
Overview of the backside of the heatsink and some of the components. Controller has not been mounted.
At the bottom is the shunt. You also see two round black holes - this is where the B+ and B- wires come in from the pack.
Close-up of the shunt and another copper strap going to the B- terminal on the controller.
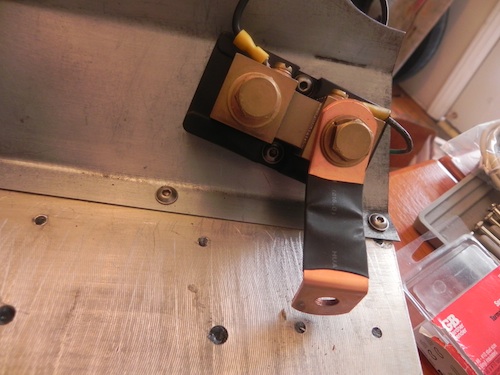
Ants-eye view of the contactor
Control wires for the contactor - as well as a reverse protection diode. The diode makes sure the contactor field collapses when the vehicle is turned off.
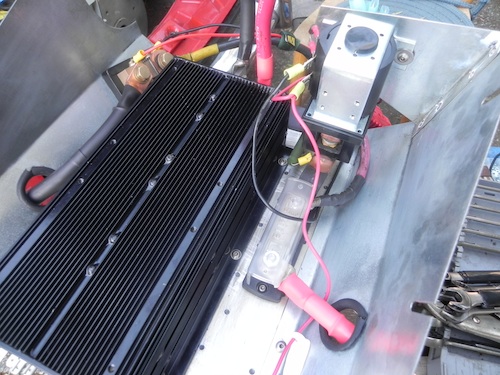
Here we have the controller and other stuff mounted on the heat sink.
The red wire on the right comes from B+ and is a straight shot to the input of the fuse block. The black wire on the left comes from B-, has to make a couple twists to get to the shunt.
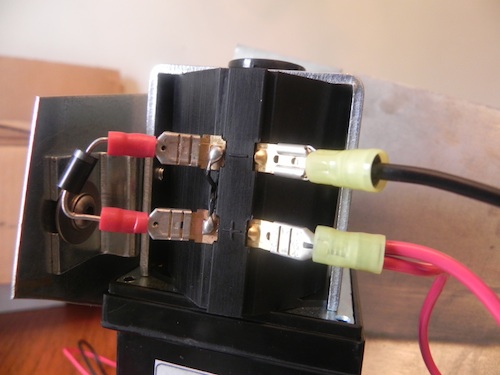
A whimsical view of the business end of the controller. We've been looking at the controller up-side-down because it's easier to work on mounting the components this way. When mounted in the car the heat sink fins are facing upwards, and these big wires sticking up in the air instead point downward and go to the motor terminals.
Series wound brushed DC motors have four terminals. There are a couple ways to wire between a controller and these terminals. For this controller two of the motor terminals are wired together, and these two wires go to the other terminals. It's possible to implement forward-reverse in electronics with a reversing contactor, however because the motor is connected to the VW transmission I'm doing forward-reverse with the gear shift.
Another view of the business end focuses on the little wires ... these are used for sensors and control.
For example the controller is turned on with a +12v that I'm controlling from the car's keyswitch. That power comes in through one of these wires. The +12 also controls the contactor. There are three wires for the dashboard gauges and for the Cycle Analyst when we get that hooked up. The wires are the positive end of the pack, and the two sides of the shunt on the negative side of the pack.
The big anderson connector goes to a pair of 4ga wires that go up front to the charger.
The big wires from pack-controller and motor-controller are 1/0 gauge.

