In fact, it is almost inconcievable that a scoot would go out of the factory without headset bearings! On the XB600 (and, I'm sure, the XB700Li) the adjustment of the bearings is very difficult due to a growth of wiring and various brackets over and around the adjustment nuts. I was able to get an approximately correct tension setting by using a nail set at an angle on the "flats" of the locknut.
A quick test for adjustment is to bring the scoot up on its center stand with the front wheel in the air, then grasp the wheel from the front with one hand and the handlebars with the other and "rock" it. There should be no play.
I just ordered some kevlar tape, 4" wide x 10 yds. to line the inside of my tires. this will help prevent flats. I also found a store that sells Cheng Shin Tires (CST) these are exact duplicates of the one I got with my 800 watt motor assembly.
Here's some Pics.
The Tape;
The Tires;
Dave C. Stout
Dave C. Stout
STOUT PRODUCTIONS
Low Carbon Products
Excellent find on the tires and Kevlar! One roadside patch job and everyone will wish they'd gone to that level. I agree totally about Ceramic bearings, they ROCK! Have you put those in the 700 yet? :-) I'd love to see these things evolve to the degree of coming standard with that kind of componentry..... Lose the washing machine parts and potmetal, Bring on the top grade and precision, and it comes back in customer base, bragging rights, less cussed em er (er, thats customer) service! Thanks for sharing your mods and custom work. Its fun to see what others are riding and building.
Just a word on a tire sealant I use. You put it in the tire before a flat and if you hit a nail/glass/whatever it seals the hole/holes. It also helps to balance the tire and a major point is that it is non corrosive to the rims. Check out the web site ride-on.com, I just put some in the new tire I got at yksuccess.
Safe scooting,
Bickyd
The "goo" looks great but as always I worry about weight. I know the kevlar only weight an ounce to a ounce and a half per tire. I'll weight the pieces before I insert them a get back on that fact. I've used "goo" on my bike years ago when I had a flat when I was riding the MS150 on my pedal bike. Someone let me use some. It worked but the addition weight I could feel right away. Maybe this stuff is differant but it must weight signifigent to coat the entire inside at least several mm thick, I assume. How much does it weigh , did you weigh it?
Dave C Stout
Dave C. Stout
STOUT PRODUCTIONS
Low Carbon Products
First off, I want to say thanks Dave for all the info you have posted here so far. I was looking at your headlight conversion parts list and I am a little confused.
This is what you had listed:
Endor Star 300 Lumen 3 Up 7007-PWC-10-3 2 16.36
LED SUPPLY.com
2 x Pre-Mounted Rebel Cool White LEDs on a 20mm Tri-Star Base - 540 lm
(MR-WC100-20T) = $55.64
You put two different LED's in your head lights or am I reading this wrong? Also with the optic lens, is this for beam pattern or more for looks? Sorry, I am new at this electric stuff.
The amount suggested for the tire is 4oz, as for the weight, I've found it to be insignificant for the bike.
I also like the fact that I don't have to unmount/remount the tire to get the safety/security that I'm looking for, no flats in almost 2 years. For myself, this works fine.
Since you build your own bikes, You have the tools/experience to use the teflon tape. At a cost of about $20.00 for an 8oz bottle/2 tires,and that it takes about 1 minute to put in, it's definitely cost effective for me.
Safe Scooting,
Bickyd
P.S. I get NO money for suggesting this product, it's just worked for me. Check out their web site.
"P.S. I get NO money for suggesting this product, it's just worked for me."
HaHaHa! I like that, maybe you will, who knows who's reading these forums. Maybe even Uncle Sam.
Bickyd, I meant that by me putting this extra battery in I'm trying to drop as much other weight as possible. Every ounce means more mileage/distance. I did check the website on my iTouch but couldn't navigate around. Probably because I can't view "flash" on this damn thing. I'll check it out as soon as I crank up my PC I am curious on the weight. I'm sure it works fine. The "goo" I used did work well.
Now the LEDs , the LEDs I used were of course the rebel stars. These are the brightest and most efficient lights in the world. I know that's a bold statement but tests has proven it. These little kick ass lights produce 540 'true' lumens (@1') and the heatsink back is only 7/8" or .875" hexagonal. I mentioned the Endostar because they are an cheaper alternative.
The lens is supposedly supposed to collminate the light because ( if I remember )the LED beam is 170 degrees. BUT to tell you the truth it doesn't do such a great job. Right now I thinking of ways to definitly improve this problem. Also when the light hits the inside if the scooters lamp cover the light reflects off of it back to the scooters reflector and scatters the light even more. This give a much wider beam, much wider. So this in effect makes the light less bright on the road in front of the bike which is where I want 90% of the light to be, and it ain't . I want to "blind" anything directly in front of me. Don't get me wrong these babies are incredibly bright, but as always, I WANT MORE!!! Remember to always use a excellent thermal paste between heatsink materials.
Thanks for everyones input, it keeps me motivated.
Dave C. Stout
Dave C. Stout
STOUT PRODUCTIONS
Low Carbon Products
My new motor arrived today from yksucess and alas with my luck the arm of the brake drum housing was broken off during shipment. I'm working on getting another one sent. What are the dimensions of that 30 amp battery you picked up? I dont see them listed on their page. The led upgrades you are doing look great!
Mike
Mike - Oregon XB-508 with after- market 800watt motor and 72V upgrade
(Thanks to Member tips on V is for Voltage!)
Sorry to here about the brake lever. But I think you should be able to swap in the old one on the new rim. The rim assy is so close that next time I had it apart I was going to try swapping part to see if they indeed fit. Let me know.
The battery is 245mm*175mm*285mm as quoted from Tom Li at the battery company. I have pics showing the slight bulge in the foot area where I had to mod/place it. I think I uploaded them. I have to check but I have some pics to upload if there not up here yet.
Good luck
Dave C. Stout
Dave C. Stout
STOUT PRODUCTIONS
Low Carbon Products
Yeah I tried the swap, close but no cigar. The axle doesn't allow the outer shell from the old one to slide on. Just a hair too big. As long as I've got it apart I'm going to change the freewheel sprocket from the stock 16 tooth to a 22 tooth. The stock gearing is too tough on an old man like me heh. That full twist throttle sounds great. Where did you find one?
Mike
Mike - Oregon XB-508 with after- market 800watt motor and 72V upgrade
(Thanks to Member tips on V is for Voltage!)
--- ---------------------------------- ------- ------- ----------
1 X-T348 1 1
Full Twist Throttle w/Gauge 48V $49.99
1 POFE USPS Priority Mail Flat Rate Envelope $4.95
----------
Total $54.94 http://www.electricrider.com/
sorry it took so long, away for awhile.
I hooked up the power meter right in the handle bars, the power wires that Feed the horn. Get the polarity right! Check with meter first.
PS it's really only about 150-160 degree turning. If that but it's smooth (no spikes)
Dave C. Stout
STOUT PRODUCTIONS
Low Carbon Products
Go faster;
Company YKsuccess has a 800watt 48volt hub motor, controller, and tire with tube for $340 some dollars. That includes air mail from china. It took ab amazing four days to get here. It's perfect! I bought another battery from Xtreme ( just the batteries ) and mounted them under the seat. It's a tight fit but they fit. Then I solders a plug from the pwr supply of an old computer (they're the same as on the battery) onto the new batteries so I can use the same charger, and useing the female pwr cord from that old PC, I wired the old battery to the new battery in parallel so as to keep the 48 v but increase my amps to a 40 amp nominal rating. My 700Li goes almost 30mph even up 8 to 10 % grades. It's wonderful. I can still take out both battery packs and charge them or leave them in and charge them.
Dave S.
DeputyDave, Thanks -- What size are the IEC C13 & C14 cables(18 AWG SVT or 16 AWG or 14 AWG SJT) and how did you connect both batteries safely? Did you connect both thicker discharge red(pos.) wires twisted together to form one wire and the thicker black(neg.) discharge wires twisted together into one wire? OR WHAT/ HOW??
This is what I'm trying to do : I'm running an other thread "How do I connect 2 lifepo4 48V 20ah LiFePo4 batteries" Let me simplify this:
1) My new XB-700Li(has 48V 15-17ah? LiFePo4 batt - factory upgrade) has a male C14 IEC plug/terminal on the batt box. I plan on plugging a Heavy duty 14awg SJT(thicker insulation than SVT) female C13 plug into the batt boxes' male IEC C14 plug/terminal and run the cable to a Blue Sea systems(hard wired under the seat) 48V 500a - 700a battery marine switch( 4 positions - OFF, Batt #1, Batt #2 & batt 1 & 2) #PN3003 (with an alternator field disconnect)(in case I add the series-hybrid generator/ battery trailer later) as Battery #1.
2) I need to combine my two(2) 48V 20ah LiFePo4 packs into one. One battery will be under the seat, the 2nd batt will be in a tackle box on the floor boards by my feet and the power cable(to the hubmotor) w/ a female IEC C13 plug will be easily rerouted to the seat box. Can I parallel the two(2) packs by twisting the two(one from each pack)red positive discharge wires together and inserting both into one terminal of the first 175a anderson connector and twisting both black negative discharge wires together and inserting them both into the other terminal on the first anderson connector and run a single red(pos) wire from the 2nd anderson connector's positve terminal to the battery switch and repeating the same for the one single black(neg) wire from the 2nd anderson negative terminal to the battery switch? Does this parallel the two packs safely? So that batt #1(48v 15ah?) is from the scooter to the 48V battery switch and batt #2 is the combined two (2) 48V 20ah packs into one (1) 48V 40ah pack to the battery switch? Thanks again!! PEACE OUT !!!!!
Dave, Can you tell me what ratings the old computer terminals and wire cables are? Most are 18 AWG and are SVT(thinner insulation) rated not SJT(thicker) and 14AWG? Have your battery mods held up o.k.? Thanks, Mark
Mark and snowryder;
I haven't sized my wires, but I wire in parallel so voltage stays the same but current increases. But I'd be careful wiring two differant current sized batteries together. I would definetly find some hi current diodes and attach them to the smaller(15-17A) batterys exit wires so current won't back in and damage/blowup your "old" battery. It read/lookup a wire current ratings chart for amperage limits. 16-18 I think will carry 20A loads, or is it just 15A? Any way I just used wire nuts to secure them together. Red to red, blk to blk. Believe it or not I still have every thing electrical hooked up to the old original controller EXCEPT THE MOTOR! yes that's right I have two controllers under the seat ( piggybacked ). At first I didn't know how the electrical cables were ran and I wanted to hook up my new controller, motor and wheel assy. So I just wired that in, then I just got lazy so their both still in there. So I have a large, very large wire nut holding things together. I'm going to make a good solder connection soon because once the wire start oxidizing I'll be using more "juice" with no added benifits. Remember that with the other controller wired in I'm not using any more electric when ignition key is turned off and very little power when it it "on" because only one controller is on. My motor. (I think any way).
I do have a correction though, that is, the mileage I stated is wrong for my new system. Keeping my speed around 20-22 maybe 24-26mph, sometimes I can achive, YES READ THIS! an amazing 32 mile distance on one battery charge. YES!! and that is with 1500ft of hill climbing (ascending). OMG! I bet if I kept my speed below 21 mph, always ( that means riding legally ) I'd probably be able to ride almost 40 eph'n miles per charge. That 32 miles per charge didn't end with a totally discharged battery, I had more in the battery, I just didn't feel like finding that limit and end up pushing the dang thing home.
I hope that helped and gave people more incentive to MOD.
As always, happy cycling people.
Dave C. Stout
STOUT PRODUCTIONS
Low Carbon Products
DeputyDave, Thanks - Are you saying you plugged the used computer cord with a female end(C13 IEC 320) into the scooter battery box and ran it up to the seat box? Then took the separate wires on the other end of the used computer cord and hooked(with battery nuts and eyehooks(rings)) the red(pos)wire to the red(pos) wire of the new battery and the same for the black(neg) wires and made one 40ah battery in parallel? Normally, I think, you are supposed to hook the pos. and neg. wires of the second battery to the farthest part of the first battery packs discharge pos. & neg. wires. So, you are hooking up the 2nd batteries red discharge wire to the farstest pos. terminal from the first batteries pos. discharge wire and the same for the black(neg.) dischaege wires. But, I was hoping I could hook both batteries positive discharge wires into one pos. and both batteries negative wires into one neg. discharge wire with the schottky diodes for back up current protection(which I learned from Visforvoltage and endless-sphere members) without having to take apart the first battery and finding the correct spots to hook the second batteries discharge wires to? Is that what you did??? I am getting 30 - 33 miles range on my first original 48V 17ah? LiFePo4 pack(17 lbs.)in the mountains roads of Vail valley Colorado but, need to add more range.
So, this seems to be my current scheme to not disassemble the battery packs -
1) I purchased a Blue Sea Systems 48V 4 position(off; bank 1; bank 2 & banks 1 & 2 combined) battery switch(#6007) from ebay - check specs. at: www.bluesea.com/category/1/products/6007
a) If I can hook both of my extra 48V 20ah LiFePo4 battery packs into one 40ah pack, as discribed above, then I could hook the positive discharge wire of the combined 40ah pack to the bank 2 terminal of the switch and the first scooters' 17ah packs positive discharge wire(with a 14AWG female IEC C14 SJT 15A cord) to bank 1 of the battery switch. Then run the positive dicharge cable from the switch to the controller / hubmotor power cord. Allowing me to turn one bank off and disconnect or charge the low battery and still run on the full battery pack.
I will need to correctly connect the negative discharge wires from each battery to the controller/hubmotor power cable to complete the curcuit, safely. Is that correct? Can I connect both negative discharge wires to each other( with back-up protection diodes before the connection points of both negative & positive discharge wires) and connect that doubled wire to the controller/hubmotor power cable?
If I can not do that, then:
2) a) I think I will connect the scooter battery(17ah) with a 14AWG C13 female to C14 male IEC 320 SJT 15A connector cord, to the seat box to manually plug into the controller/hubmotor power plug for emergency power and:
b) And hook the the 2 separate 20ah battery packs to separate posts(banks 1 and then bank 2) of the switch. switching from 1st 20ah pack to 2nd pack or combining packs with the switch? Is that correct???
c) They(Blue Sea) also say I could connect more than one positive(from different batt banks) to one post of the switch to combine more than two battery banks in parallel but, I may need the bigger model # 3002 or 3003 switch!!!
Thanks - What do you Think??? snowryder
DeputyDave, Thanks - this what Blue Sea systems e-mailed me about the battery switch;
ply
Reply all
Forward
|
Full view
RE: ***SPAM*** RE: ***SPAM*** Re: PN3002 or PN3003
From: Terry Golombek (Tgolombek [at] bluesea.com)
Sent: Thu 5/20/10 3:39 PM
To: snowryder_md [at] hotmail.com (snowryder_md [at] hotmail.com)
4 attachments | Download all attachments (72.0 KB)
image001.gif (5.9 KB), image002.jpg (9.8 KB), image003.jpg (9.9 KB), image005.png (46.4 KB)
Dear Mr. DeFelice,
I believe I am the person you spoke with on the telephone this morning.
What I actually suggested to you was the possibility of permanently paralleling the batteries together to increase overall capacity without changing anything else in the system. This means not using any kind of battery switch because one would not be necessary unless you only want them parallel some of the time. If you goal is only to get extra capacity I do not know why you would only want it some of the time, but it is not my scooter.
The following article may help your understanding of the parallel arrangement:
Battery Arrangements
In almost any device that uses batteries, you do not use just one cell at a time. You normally group them together serially to form higher voltages, or sometimes in parallel to a) form the ability to draw higher currents, and b) to give a greater capacity. In a serial arrangement, the voltages add up. In a parallel arrangement, the currents, and capacities add up. The following diagram shows these two arrangements:
The upper arrangement is called a parallel arrangement. If you assume each cell produces 1.5 volts, then four batteries in parallel will also produce 1.5 volts, but the potential current that can supplied will be four times that of a single cell. Also if you assume that one battery would go flat in one our then when wired in parallel, four batteries would take four hours to go flat.
The lower arrangement is called a serial arrangement. The four voltages add together to produce 6 volts. Their ability to supply current remains the same as one battery, and given any current draw the duration they will remain charged remains the same.
Normally, when you buy a pack of batteries, the package will tell you the voltage and current rating for the battery. For example, most receiver packs use four nickel-cadmium batteries that are rated at 1.2 volts and 700 milliamp-hours (mAh) for each cell. The milliamp-hour rating means that the cell can produce 700 milliamps for one hour. In general, you can scale milliamp-hours linearly -- this battery could produce 350 milliamps for two hours or 1,400 milliamps for half an hour. It is not completely linear -- all batteries have a maximum current they can produce, and many battery chemistries have longer or shorter than the expected life at very low currents -- but it is generally linear over a normal range. Using the amp-hour rating, you can estimate how long the battery will last under a given load.
If you arrange four of these batteries in a serial arrangement, you get 4.8 volts (1.2 x 4) at 700 milliamp-hours. If you arrange them in parallel, you get 1.2 volts at 2,800 (700 x 4) milliamp-hours.
Have you ever looked inside a normal 9-volt battery? It contains six, very small batteries producing 1.5 volts each in a serial arrangement.
What we can't help you with are any battery issues specifically related to your scooter's electrical system because as Erin pointed out we are not experts on your scooter or the type of batteries it uses.
The wiring diagram supplied with part number 3002 and 3003 is below (also available on our web site):
This diagram does not address the battery negatives because they are not connected to the switch in any way. For your understanding the "1 + 2" parallel position on the battery switch will only work if your battery negatives are already connected to each other. If you wanted to show the negatives connected together in the above diagram all you would have to do is draw an uninteruppted solid line connecting the negative post of the battery on the left to the negative post of the battery on the right. This connection would not touch the battery switch in any way on the diagram.
"The information contained in this message may be privileged, confidential, and protected from disclosure. If you are not the intended recipient, or an employee, or agent responsible for delivering this message to the intended recipient, you are hereby notified that any dissemination, distribution, or copying of this communication is strictly prohibited. If you have received this communication in error, please notify us immediately by replying to the message and deleting from your computer. “
DEPUTYDAVE,
I tried to copy the diagram but, I can't get to work - I will try again to copy and download the diagram. I want to know if I hook the positives from each battery to the switch and the power output positive to the motor/controller then I should be running the negative from the the motor/controller back to the batteries and I need to know if I should put the schottky diodes on the negative discharge leads from the two packs(one negative wire into the two negative battery leads tied together- Y'ed) or if it is a waste because, I will be switching from one pack to the other with the battery switch??? So, power should not be able to reverse to the off battery and if I combine them with the bank 1 & 2 position then the power will return to both battery packs because the curcuit is open to both? Is that correct?? Thanks - snowryder
well basically I take batteries out in the winter time to charge them in a warm area. this two battery scenerio was a test. but I don'.t have two sets of batteries in there any more. the LiFePo4 battery 48V 30A is a beauty and works perfect on it own. besides i'm a weight minded person and carrying all that xtra weight was just too much. and I did notice it when turning since that weight under my seat was up so high.
M optimum-china battery is perfect on it's own 48V (full charge 58.7VDC ) 30amp with a BMS is IDEAL! to say the least. NO "cutoffs" too. and if I keep the speed down to just above the speed limit (20mph) I get around 30mpc. that's climbing OVER 1500 feet of terrain. Plus the recharge rate is up around 800 to 1000 times maintaining 80% of it's charge. I can't prove that statement yet. But the manfacturers can,But anyway heres the general way I hooked my system up.
When I needed to add a length of wire I copied all wire sizes that X-Treme used for that particular task. I also soldered all connections stead of using mechanical connectors. then used heatshrink tubing. Remember to place heatshrink tubing on wires before soldering. and make sure they are at least 6" away from the heat of the solder too.
I hope that helps.
Dave C. Stout
Dave C. Stout
STOUT PRODUCTIONS
Low Carbon Products
well basically I take batteries out in the winter time to charge them in a warm area. this two battery scenerio was a test. but I don'.t have two sets of batteries in there any more. the LiFePo4 battery 48V 30A is a beauty and works perfect on it own. besides i'm a weight minded person and carrying all that xtra weight was just too much. and I did notice it when turning since that weight under my seat was up so high.
M optimum-china battery is perfect on it's own 48V (full charge 58.7VDC ) 30amp with a BMS is IDEAL! to say the least. NO "cutoffs" too. and if I keep the speed down to just above the speed limit (20mph) I get around 30mpc. that's climbing OVER 1500 feet of terrain. Plus the recharge rate is up around 800 to 1000 times maintaining 80% of it's charge. I can't prove that statement yet. But the manfacturers can,But anyway heres the general way I hooked my system up.
When I needed to add a length of wire I copied all wire sizes that X-Treme used for that particular task. I also soldered all connections stead of using mechanical connectors. then used heatshrink tubing. Remember to place heatshrink tubing on wires before soldering. and make sure they are at least 6" away from the heat of the solder too.
I hope that helps.
Dave C. Stout
Dave, Thanks that helps me understand it better - These are all experiments, until we each get where we want to go with the least amount of work. In the mountains of Colorado, I diffidently need more range!!!!!!!!!! I will not carry all 3 battery packs unless I need it. The x-treme LiFePo4 battery pack(17ah? I think) is very small - I think they should have an option for a 35ah or more placed the floor boards !!! Allot of us are buying each power packs, anyway!!! GOOD LUCK - Thanks for the excellent help!! Snowryder
Dave , Thanks again - I should have added this to the last post - Sorry !!!
MY new x-treme LiFePo4 battery(17ah - I think-17lbs.) that came with this scooter had no BMS but, it did have the balancing wires coming out of the pack so one could be hooked up if needed.
So, now you are just using the 30ah batt(with BMS) as a replacement for your original and secondary batteries that you used to have? Or are you using all 3 packs together? I am thinking you are not because of your weight distribution and ride handling. I believe you are correct about handling and extra weight. I will try to see if I can get one of my 20ah packs to fit in the scooter batt box(and drill an extra hole for the second packs wires) to keep the weight low to the ground. Then I will only add the 3rd pack on when I want to go more than 70 miles on a charge. I have not hooked them up, yet. I am waiting for the switch, a couple sets of 45a anderson powerpole connectors and the 14AWG 15a connector cables, after memorial WE. I will update with pics of the build when I reload my drivers on this computer - I can't upload any pics since I had to reboot the Vista program after a resent crash !!! Thanks, snowryder
There's a couple of pics of my mod'd battery compartment on the first page of this thread. It's about 3/4 of the way down. I have since cut the floor mat down to account for the 'bump out'. I left the mat longer on the side to wrap up the two sides of the ' bump up' soupy can't see the battery. I can still fit my bigfeet on either side of the battery and carry my case of BEER! on top of the battery cover. That's why I made it structurally sound.
Dave C. Stout
Dave C. Stout
STOUT PRODUCTIONS
Low Carbon Products
Dave, Thanks again - Question - What is the writing on your schematic, just to the right of the charging ports with the arrow to the line? I think it is a anti-reversing diode, can you explain it alittle or tell me where you got it? THANKS
http://www.futurlec.com/ go here and search "diode" look at the reverse voltage rating and buy accordingly. I get mine from old high voltage sections of old TVs. I mess around with the fly back transformers and use the hi voltage diodes and capacitors to built things.
Dave C. Stout
Dave C. Stout
STOUT PRODUCTIONS
Low Carbon Products
Deputydaves,
Thanks soo much for the info RE yksuccess and the hub motor you got from them.
I received mine two days ago and MAN what an improvement! From the time I contacted Sue via E-mail till the time I received it was about 2 weeks and was/is well worth the wait. My XB-700li runs like a champ now.
I'll look into battery upgrades soon after I get this silly grin off my face!! Oh, by the way, they threw in a new throttle along with it at no charge after I told her about the issue you had.
Thanks again!
Safe scooting,
Bickyd
I am seriously thinking about this upgrade. Wondering if it was easy to hook up to existing system? How many miles do you get with a full charge? Thanks in advance,
Jeff
Well I'll tell ya, after getting stopped by da cops two weeks ago I'm really trying to watch my speed. If I keepmy speed hovering around 20 mph +-2 or 3 mph I get an amazing 32 miles per charge with a total altitude climb at over 1000 feet. How's that!! And I haven't riden until the battery went dead so who knows how much further I could go. I will run it 'dry' soon to see just how far I could go. I'm in the process of installing a better current meter and a voltage meter on the dash and I'm going to install some cool 3mm led blue dash lights to light up my dashboard. I'm ripping out the useless 'speedometer' that came with the scooter.
Anyway, the cops stopped me and issued a $10 fine for riding without registration. Even though I had all the paperwork. I got even more info at 'consumer product safty' website. Go here http://www.cpsc.gov/ and in the upper left search box simply type '1512'
That's it and it will list everything related to bicycles and 'low speed electric bikes'. I pleaded NOT guilty and my court date isn't until Sept 19th. I'll keep everyone updated when it comes around.
Dave C. Stout
Dave C. Stout
STOUT PRODUCTIONS
Low Carbon Products
Heya Dave! At Long Last!! My Yksucess motor is FINALLY installed and running. Wahooooooooooooooo!! Took long enough. After all the broken parts, sheared wires, busted drum housing, then tracing down the new wiring since the colors and number of pairs didn't quite match. (Major project for the electrically challenged like me), it is at least spinning!!! LOL
I'm also going to follow your lead and pull the controller open and make sure all the mosfets have a generous amount of thermal grease. I wound up with an extra wire coming from the speedometer that has no where to connect to on the new controller. Anyone know what voltage or pulse the old controller was sending to it that I might tap into on this new one?
Last detail is finding out why it starts to bind up as I start to even slightly tighten up the axle bolts on it. Must not have a washer somewhere I need to. Anyways great score Dave! Thanks again.
Oh yeah!.. I wanted to ask where you picked up that full twist throttle. I gotta have one of those now too!!
Mike
Mike - Oregon XB-508 with after- market 800watt motor and 72V upgrade
(Thanks to Member tips on V is for Voltage!)
Yeah I had an extra wire for the 'speedometer' too. The speedometer that can with the XB700Li scooter was/is useless anyway. I bought 2 meters as seen in the above pics so I did nothing with the extra wire.
I have listed in this thread I think about the cost and vendor or the 'full twist throttle' which like I said before is only about 90 degrees of movement, so why they call it 'full twist' I don't know.
The binding may be because the inner nut of the axel may be too tight so when you tighten the last nut it binds. The have too be just right so when you tighten the last nut they both tighten to the right torque. It's tough but be careful because you could crack a bearing and then that will ruin the race and the whole assembly. Technically you should have a thin wrench to hold the inner nut so as to not to let then move when tightening the outer nut... Technically, but who has a wrench of that size that thin?
Good luck
DaveC. Stout
Dave C. Stout
STOUT PRODUCTIONS
Low Carbon Products
Yeah the speedometer on the XB550 was worthless too. I hear the 500 is as well. Fine with me, I'm going to take over the dash space anyway like I see you have hehe. The twist throttle I was hoping was a more full range motion than 90 degrees, I misunderstood. And yes I found the binding problem. Apparently a spacing rod or washers was missing that holds the brake drum assembly out and away a bit from the brake pad housing assembly. Now I see even more why the box was all taped up with DHL tape around a gaping hole. Lot of parts were missing. Ah well, back to the hardware store. Good tips though on the tightning and yes I am in need of a wrench that size that thin too!
Should be ready to ride after the final washers though! heh heh heh. I've been stopped by cops twice so far with the old motor with mods. Wait till they see me now! Hah
Mike
Mike - Oregon XB-508 with after- market 800watt motor and 72V upgrade
(Thanks to Member tips on V is for Voltage!)
I have been riding the new motor for the last week now, rock solid even in the heat, and the performance is great! The speed is very similar to what I was getting with the stock 550 watt motor ramped up to 72 volts, yet doing it at 48 volts. The torque is a little better than the old one though. Next project is to ramp this one up to 72 volts also. I rode the old one every day for a year at 72v so I know they can handle it fine. The performance will be amazing I am sure.
I could not find any washers anywhere the right size to replace to missing spacer in the brake drum assembly. I decided to just cut some pipe to the right length, yet no plumbing or electrical pipe was a good fit, all were sloppy. I got lucky in the picture framing dept at home depot, there were 2 sizes of square pipe and 2 sizes of round pipe, and one of them happened to be a perfect fit. Steel no less! Then, in order to be able to use the correct amount of washers on the axle to be able to tighten the wheel on the forks without binding as I was having problems with, it turned out I needed about a 1/4 inch more space between the forks in order to do so. In asking around a friend loaned me his 10 ton hydraulic "puller" (it's more a spreader really) he uses for car body repair to spread the forks. Sounds big but its actually a small unit about 2 feet long and about 4 inches wide. But plenty strong to spread those steel forks! I highly recommend it to any XB series owners that go for this upgrade that end up needing a little more space. I'm sure rental yards have them.
I didnt want to starve this motor for current so I rewired the bike from the batteries to each other and then to the controller with 10 gauge wire and connectors, because the innards of most connectors and fuse holders are pathetic and the actual surface area that makes contact inside, reduces your connection to about a 22 gauge effectively. And your battery supply current is only as good as the weakest link in the chain. So going through 10 gauge connectors get me back up to the 12g which is the largest on the controller.
I put Neutrik 4 wire 40amp power lock connectors on the battery cables, so switching from bike to battery charger is a snap, and no annoying zap when the batteries connect! They just slide in and then a 1/4 turn to the right till you hear a small click. I put their 8 wire connector on the motor cable, so removing the wheel for flat repair is now one quick twist.
Once again Dave thanks for the great find! I recommend this motor to anyone with any XB series bike. Just plug it in with the standard 48 volts your bike came with, and you will see a major improvement in performance! Personally I am going to run it at 72 volts and am sure it will go like a bat out of hell.
Mike - Oregon XB-508 with after- market 800watt motor and 72V upgrade
(Thanks to Member tips on V is for Voltage!)


In fact, it is almost inconcievable that a scoot would go out of the factory without headset bearings! On the XB600 (and, I'm sure, the XB700Li) the adjustment of the bearings is very difficult due to a growth of wiring and various brackets over and around the adjustment nuts. I was able to get an approximately correct tension setting by using a nail set at an angle on the "flats" of the locknut.
A quick test for adjustment is to bring the scoot up on its center stand with the front wheel in the air, then grasp the wheel from the front with one hand and the handlebars with the other and "rock" it. There should be no play.
Mark
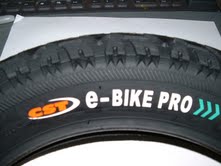
I just ordered some kevlar tape, 4" wide x 10 yds. to line the inside of my tires. this will help prevent flats. I also found a store that sells Cheng Shin Tires (CST) these are exact duplicates of the one I got with my 800 watt motor assembly.
Here's some Pics.
The Tape;

The Tires;
Dave C. Stout
Dave C. Stout
STOUT PRODUCTIONS
Low Carbon Products
Excellent find on the tires and Kevlar! One roadside patch job and everyone will wish they'd gone to that level. I agree totally about Ceramic bearings, they ROCK! Have you put those in the 700 yet? :-) I'd love to see these things evolve to the degree of coming standard with that kind of componentry..... Lose the washing machine parts and potmetal, Bring on the top grade and precision, and it comes back in customer base, bragging rights, less cussed em er (er, thats customer) service! Thanks for sharing your mods and custom work. Its fun to see what others are riding and building.
Just a word on a tire sealant I use. You put it in the tire before a flat and if you hit a nail/glass/whatever it seals the hole/holes. It also helps to balance the tire and a major point is that it is non corrosive to the rims. Check out the web site ride-on.com, I just put some in the new tire I got at yksuccess.
Safe scooting,
Bickyd
The "goo" looks great but as always I worry about weight. I know the kevlar only weight an ounce to a ounce and a half per tire. I'll weight the pieces before I insert them a get back on that fact. I've used "goo" on my bike years ago when I had a flat when I was riding the MS150 on my pedal bike. Someone let me use some. It worked but the addition weight I could feel right away. Maybe this stuff is differant but it must weight signifigent to coat the entire inside at least several mm thick, I assume. How much does it weigh , did you weigh it?
Dave C Stout
Dave C. Stout
STOUT PRODUCTIONS
Low Carbon Products
First off, I want to say thanks Dave for all the info you have posted here so far. I was looking at your headlight conversion parts list and I am a little confused.
This is what you had listed:
Endor Star 300 Lumen 3 Up 7007-PWC-10-3 2 16.36
LED SUPPLY.com
2 x Pre-Mounted Rebel Cool White LEDs on a 20mm Tri-Star Base - 540 lm
(MR-WC100-20T) = $55.64
You put two different LED's in your head lights or am I reading this wrong? Also with the optic lens, is this for beam pattern or more for looks? Sorry, I am new at this electric stuff.
Hi Deputydave's,
The amount suggested for the tire is 4oz, as for the weight, I've found it to be insignificant for the bike.
I also like the fact that I don't have to unmount/remount the tire to get the safety/security that I'm looking for, no flats in almost 2 years. For myself, this works fine.
Since you build your own bikes, You have the tools/experience to use the teflon tape. At a cost of about $20.00 for an 8oz bottle/2 tires,and that it takes about 1 minute to put in, it's definitely cost effective for me.
Safe Scooting,
Bickyd
P.S. I get NO money for suggesting this product, it's just worked for me. Check out their web site.
"P.S. I get NO money for suggesting this product, it's just worked for me."
HaHaHa! I like that, maybe you will, who knows who's reading these forums. Maybe even Uncle Sam.
Bickyd, I meant that by me putting this extra battery in I'm trying to drop as much other weight as possible. Every ounce means more mileage/distance. I did check the website on my iTouch but couldn't navigate around. Probably because I can't view "flash" on this damn thing. I'll check it out as soon as I crank up my PC I am curious on the weight. I'm sure it works fine. The "goo" I used did work well.
Now the LEDs , the LEDs I used were of course the rebel stars. These are the brightest and most efficient lights in the world. I know that's a bold statement but tests has proven it. These little kick ass lights produce 540 'true' lumens (@1') and the heatsink back is only 7/8" or .875" hexagonal. I mentioned the Endostar because they are an cheaper alternative.
The lens is supposedly supposed to collminate the light because ( if I remember )the LED beam is 170 degrees. BUT to tell you the truth it doesn't do such a great job. Right now I thinking of ways to definitly improve this problem. Also when the light hits the inside if the scooters lamp cover the light reflects off of it back to the scooters reflector and scatters the light even more. This give a much wider beam, much wider. So this in effect makes the light less bright on the road in front of the bike which is where I want 90% of the light to be, and it ain't . I want to "blind" anything directly in front of me. Don't get me wrong these babies are incredibly bright, but as always, I WANT MORE!!! Remember to always use a excellent thermal paste between heatsink materials.
Thanks for everyones input, it keeps me motivated.
Dave C. Stout
Dave C. Stout
STOUT PRODUCTIONS
Low Carbon Products
Hey Dave,
My new motor arrived today from yksucess and alas with my luck the arm of the brake drum housing was broken off during shipment. I'm working on getting another one sent. What are the dimensions of that 30 amp battery you picked up? I dont see them listed on their page. The led upgrades you are doing look great!
Mike
Mike - Oregon XB-508 with after- market 800watt motor and 72V upgrade
(Thanks to Member tips on V is for Voltage!)
Sorry to here about the brake lever. But I think you should be able to swap in the old one on the new rim. The rim assy is so close that next time I had it apart I was going to try swapping part to see if they indeed fit. Let me know.
The battery is 245mm*175mm*285mm as quoted from Tom Li at the battery company. I have pics showing the slight bulge in the foot area where I had to mod/place it. I think I uploaded them. I have to check but I have some pics to upload if there not up here yet.
Good luck
Dave C. Stout
Dave C. Stout
STOUT PRODUCTIONS
Low Carbon Products
Yeah I tried the swap, close but no cigar. The axle doesn't allow the outer shell from the old one to slide on. Just a hair too big. As long as I've got it apart I'm going to change the freewheel sprocket from the stock 16 tooth to a 22 tooth. The stock gearing is too tough on an old man like me heh. That full twist throttle sounds great. Where did you find one?
Mike
Mike - Oregon XB-508 with after- market 800watt motor and 72V upgrade
(Thanks to Member tips on V is for Voltage!)
--- ---------------------------------- ------- ------- ----------
1 X-T348 1 1
Full Twist Throttle w/Gauge 48V $49.99
1 POFE USPS Priority Mail Flat Rate Envelope $4.95
----------
Total $54.94
http://www.electricrider.com/
sorry it took so long, away for awhile.
I hooked up the power meter right in the handle bars, the power wires that Feed the horn. Get the polarity right! Check with meter first.
PS it's really only about 150-160 degree turning. If that but it's smooth (no spikes)
Dave C. Stout
STOUT PRODUCTIONS
Low Carbon Products
DeputyDave, Thanks -- What size are the IEC C13 & C14 cables(18 AWG SVT or 16 AWG or 14 AWG SJT) and how did you connect both batteries safely? Did you connect both thicker discharge red(pos.) wires twisted together to form one wire and the thicker black(neg.) discharge wires twisted together into one wire? OR WHAT/ HOW??
This is what I'm trying to do : I'm running an other thread "How do I connect 2 lifepo4 48V 20ah LiFePo4 batteries" Let me simplify this:
1) My new XB-700Li(has 48V 15-17ah? LiFePo4 batt - factory upgrade) has a male C14 IEC plug/terminal on the batt box. I plan on plugging a Heavy duty 14awg SJT(thicker insulation than SVT) female C13 plug into the batt boxes' male IEC C14 plug/terminal and run the cable to a Blue Sea systems(hard wired under the seat) 48V 500a - 700a battery marine switch( 4 positions - OFF, Batt #1, Batt #2 & batt 1 & 2) #PN3003 (with an alternator field disconnect)(in case I add the series-hybrid generator/ battery trailer later) as Battery #1.
2) I need to combine my two(2) 48V 20ah LiFePo4 packs into one. One battery will be under the seat, the 2nd batt will be in a tackle box on the floor boards by my feet and the power cable(to the hubmotor) w/ a female IEC C13 plug will be easily rerouted to the seat box. Can I parallel the two(2) packs by twisting the two(one from each pack)red positive discharge wires together and inserting both into one terminal of the first 175a anderson connector and twisting both black negative discharge wires together and inserting them both into the other terminal on the first anderson connector and run a single red(pos) wire from the 2nd anderson connector's positve terminal to the battery switch and repeating the same for the one single black(neg) wire from the 2nd anderson negative terminal to the battery switch? Does this parallel the two packs safely? So that batt #1(48v 15ah?) is from the scooter to the 48V battery switch and batt #2 is the combined two (2) 48V 20ah packs into one (1) 48V 40ah pack to the battery switch? Thanks again!! PEACE OUT !!!!!
Dave, Can you tell me what ratings the old computer terminals and wire cables are? Most are 18 AWG and are SVT(thinner insulation) rated not SJT(thicker) and 14AWG? Have your battery mods held up o.k.? Thanks, Mark
Mark and snowryder;
I haven't sized my wires, but I wire in parallel so voltage stays the same but current increases. But I'd be careful wiring two differant current sized batteries together. I would definetly find some hi current diodes and attach them to the smaller(15-17A) batterys exit wires so current won't back in and damage/blowup your "old" battery. It read/lookup a wire current ratings chart for amperage limits. 16-18 I think will carry 20A loads, or is it just 15A? Any way I just used wire nuts to secure them together. Red to red, blk to blk. Believe it or not I still have every thing electrical hooked up to the old original controller EXCEPT THE MOTOR! yes that's right I have two controllers under the seat ( piggybacked ). At first I didn't know how the electrical cables were ran and I wanted to hook up my new controller, motor and wheel assy. So I just wired that in, then I just got lazy so their both still in there. So I have a large, very large wire nut holding things together. I'm going to make a good solder connection soon because once the wire start oxidizing I'll be using more "juice" with no added benifits. Remember that with the other controller wired in I'm not using any more electric when ignition key is turned off and very little power when it it "on" because only one controller is on. My motor. (I think any way).
I do have a correction though, that is, the mileage I stated is wrong for my new system. Keeping my speed around 20-22 maybe 24-26mph, sometimes I can achive, YES READ THIS! an amazing 32 mile distance on one battery charge. YES!! and that is with 1500ft of hill climbing (ascending). OMG! I bet if I kept my speed below 21 mph, always ( that means riding legally ) I'd probably be able to ride almost 40 eph'n miles per charge. That 32 miles per charge didn't end with a totally discharged battery, I had more in the battery, I just didn't feel like finding that limit and end up pushing the dang thing home.
I hope that helped and gave people more incentive to MOD.
As always, happy cycling people.
Dave C. Stout
STOUT PRODUCTIONS
Low Carbon Products
DeputyDave, Thanks - Are you saying you plugged the used computer cord with a female end(C13 IEC 320) into the scooter battery box and ran it up to the seat box? Then took the separate wires on the other end of the used computer cord and hooked(with battery nuts and eyehooks(rings)) the red(pos)wire to the red(pos) wire of the new battery and the same for the black(neg) wires and made one 40ah battery in parallel? Normally, I think, you are supposed to hook the pos. and neg. wires of the second battery to the farthest part of the first battery packs discharge pos. & neg. wires. So, you are hooking up the 2nd batteries red discharge wire to the farstest pos. terminal from the first batteries pos. discharge wire and the same for the black(neg.) dischaege wires. But, I was hoping I could hook both batteries positive discharge wires into one pos. and both batteries negative wires into one neg. discharge wire with the schottky diodes for back up current protection(which I learned from Visforvoltage and endless-sphere members) without having to take apart the first battery and finding the correct spots to hook the second batteries discharge wires to? Is that what you did??? I am getting 30 - 33 miles range on my first original 48V 17ah? LiFePo4 pack(17 lbs.)in the mountains roads of Vail valley Colorado but, need to add more range.
So, this seems to be my current scheme to not disassemble the battery packs -
1) I purchased a Blue Sea Systems 48V 4 position(off; bank 1; bank 2 & banks 1 & 2 combined) battery switch(#6007) from ebay - check specs. at: www.bluesea.com/category/1/products/6007
a) If I can hook both of my extra 48V 20ah LiFePo4 battery packs into one 40ah pack, as discribed above, then I could hook the positive discharge wire of the combined 40ah pack to the bank 2 terminal of the switch and the first scooters' 17ah packs positive discharge wire(with a 14AWG female IEC C14 SJT 15A cord) to bank 1 of the battery switch. Then run the positive dicharge cable from the switch to the controller / hubmotor power cord. Allowing me to turn one bank off and disconnect or charge the low battery and still run on the full battery pack.
I will need to correctly connect the negative discharge wires from each battery to the controller/hubmotor power cable to complete the curcuit, safely. Is that correct? Can I connect both negative discharge wires to each other( with back-up protection diodes before the connection points of both negative & positive discharge wires) and connect that doubled wire to the controller/hubmotor power cable?
If I can not do that, then:
2) a) I think I will connect the scooter battery(17ah) with a 14AWG C13 female to C14 male IEC 320 SJT 15A connector cord, to the seat box to manually plug into the controller/hubmotor power plug for emergency power and:
b) And hook the the 2 separate 20ah battery packs to separate posts(banks 1 and then bank 2) of the switch. switching from 1st 20ah pack to 2nd pack or combining packs with the switch? Is that correct???
c) They(Blue Sea) also say I could connect more than one positive(from different batt banks) to one post of the switch to combine more than two battery banks in parallel but, I may need the bigger model # 3002 or 3003 switch!!!
Thanks - What do you Think??? snowryder
DeputyDave, Thanks - this what Blue Sea systems e-mailed me about the battery switch;
ply
Reply all
Forward
|
Full view
RE: ***SPAM*** RE: ***SPAM*** Re: PN3002 or PN3003
From: Terry Golombek (Tgolombek [at] bluesea.com)
Sent: Thu 5/20/10 3:39 PM
To: snowryder_md [at] hotmail.com (snowryder_md [at] hotmail.com)
4 attachments | Download all attachments (72.0 KB)
image001.gif (5.9 KB), image002.jpg (9.8 KB), image003.jpg (9.9 KB), image005.png (46.4 KB)
Dear Mr. DeFelice,
I believe I am the person you spoke with on the telephone this morning.
What I actually suggested to you was the possibility of permanently paralleling the batteries together to increase overall capacity without changing anything else in the system. This means not using any kind of battery switch because one would not be necessary unless you only want them parallel some of the time. If you goal is only to get extra capacity I do not know why you would only want it some of the time, but it is not my scooter.
The following article may help your understanding of the parallel arrangement:
Battery Arrangements
In almost any device that uses batteries, you do not use just one cell at a time. You normally group them together serially to form higher voltages, or sometimes in parallel to a) form the ability to draw higher currents, and b) to give a greater capacity. In a serial arrangement, the voltages add up. In a parallel arrangement, the currents, and capacities add up. The following diagram shows these two arrangements:
The upper arrangement is called a parallel arrangement. If you assume each cell produces 1.5 volts, then four batteries in parallel will also produce 1.5 volts, but the potential current that can supplied will be four times that of a single cell. Also if you assume that one battery would go flat in one our then when wired in parallel, four batteries would take four hours to go flat.
The lower arrangement is called a serial arrangement. The four voltages add together to produce 6 volts. Their ability to supply current remains the same as one battery, and given any current draw the duration they will remain charged remains the same.
Normally, when you buy a pack of batteries, the package will tell you the voltage and current rating for the battery. For example, most receiver packs use four nickel-cadmium batteries that are rated at 1.2 volts and 700 milliamp-hours (mAh) for each cell. The milliamp-hour rating means that the cell can produce 700 milliamps for one hour. In general, you can scale milliamp-hours linearly -- this battery could produce 350 milliamps for two hours or 1,400 milliamps for half an hour. It is not completely linear -- all batteries have a maximum current they can produce, and many battery chemistries have longer or shorter than the expected life at very low currents -- but it is generally linear over a normal range. Using the amp-hour rating, you can estimate how long the battery will last under a given load.
If you arrange four of these batteries in a serial arrangement, you get 4.8 volts (1.2 x 4) at 700 milliamp-hours. If you arrange them in parallel, you get 1.2 volts at 2,800 (700 x 4) milliamp-hours.
Have you ever looked inside a normal 9-volt battery? It contains six, very small batteries producing 1.5 volts each in a serial arrangement.
What we can't help you with are any battery issues specifically related to your scooter's electrical system because as Erin pointed out we are not experts on your scooter or the type of batteries it uses.
The wiring diagram supplied with part number 3002 and 3003 is below (also available on our web site):
This diagram does not address the battery negatives because they are not connected to the switch in any way. For your understanding the "1 + 2" parallel position on the battery switch will only work if your battery negatives are already connected to each other. If you wanted to show the negatives connected together in the above diagram all you would have to do is draw an uninteruppted solid line connecting the negative post of the battery on the left to the negative post of the battery on the right. This connection would not touch the battery switch in any way on the diagram.
Best Regards,
Terry Golombek
Customer Support
TEL: 360-738-8230, ext. 117
TOLL FREE: 800-222-7617
FAX: 360-734-4195
EMAIL: tgolombek [at] bluesea.com
WEB: www.bluesea.com
Confidentiality Notice:
"The information contained in this message may be privileged, confidential, and protected from disclosure. If you are not the intended recipient, or an employee, or agent responsible for delivering this message to the intended recipient, you are hereby notified that any dissemination, distribution, or copying of this communication is strictly prohibited. If you have received this communication in error, please notify us immediately by replying to the message and deleting from your computer. “
DEPUTYDAVE,
I tried to copy the diagram but, I can't get to work - I will try again to copy and download the diagram. I want to know if I hook the positives from each battery to the switch and the power output positive to the motor/controller then I should be running the negative from the the motor/controller back to the batteries and I need to know if I should put the schottky diodes on the negative discharge leads from the two packs(one negative wire into the two negative battery leads tied together- Y'ed) or if it is a waste because, I will be switching from one pack to the other with the battery switch??? So, power should not be able to reverse to the off battery and if I combine them with the bank 1 & 2 position then the power will return to both battery packs because the curcuit is open to both? Is that correct?? Thanks - snowryder
well basically I take batteries out in the winter time to charge them in a warm area. this two battery scenerio was a test. but I don'.t have two sets of batteries in there any more. the LiFePo4 battery 48V 30A is a beauty and works perfect on it own. besides i'm a weight minded person and carrying all that xtra weight was just too much. and I did notice it when turning since that weight under my seat was up so high.
M optimum-china battery is perfect on it's own 48V (full charge 58.7VDC ) 30amp with a BMS is IDEAL! to say the least. NO "cutoffs" too. and if I keep the speed down to just above the speed limit (20mph) I get around 30mpc. that's climbing OVER 1500 feet of terrain. Plus the recharge rate is up around 800 to 1000 times maintaining 80% of it's charge. I can't prove that statement yet. But the manfacturers can,But anyway heres the general way I hooked my system up.
When I needed to add a length of wire I copied all wire sizes that X-Treme used for that particular task. I also soldered all connections stead of using mechanical connectors. then used heatshrink tubing. Remember to place heatshrink tubing on wires before soldering. and make sure they are at least 6" away from the heat of the solder too.
I hope that helps.
Dave C. Stout
Dave C. Stout
STOUT PRODUCTIONS
Low Carbon Products
Dave, Thanks that helps me understand it better - These are all experiments, until we each get where we want to go with the least amount of work. In the mountains of Colorado, I diffidently need more range!!!!!!!!!! I will not carry all 3 battery packs unless I need it. The x-treme LiFePo4 battery pack(17ah? I think) is very small - I think they should have an option for a 35ah or more placed the floor boards !!! Allot of us are buying each power packs, anyway!!! GOOD LUCK - Thanks for the excellent help!! Snowryder
Dave , Thanks again - I should have added this to the last post - Sorry !!!
MY new x-treme LiFePo4 battery(17ah - I think-17lbs.) that came with this scooter had no BMS but, it did have the balancing wires coming out of the pack so one could be hooked up if needed.
So, now you are just using the 30ah batt(with BMS) as a replacement for your original and secondary batteries that you used to have? Or are you using all 3 packs together? I am thinking you are not because of your weight distribution and ride handling. I believe you are correct about handling and extra weight. I will try to see if I can get one of my 20ah packs to fit in the scooter batt box(and drill an extra hole for the second packs wires) to keep the weight low to the ground. Then I will only add the 3rd pack on when I want to go more than 70 miles on a charge. I have not hooked them up, yet. I am waiting for the switch, a couple sets of 45a anderson powerpole connectors and the 14AWG 15a connector cables, after memorial WE. I will update with pics of the build when I reload my drivers on this computer - I can't upload any pics since I had to reboot the Vista program after a resent crash !!! Thanks, snowryder
There's a couple of pics of my mod'd battery compartment on the first page of this thread. It's about 3/4 of the way down. I have since cut the floor mat down to account for the 'bump out'. I left the mat longer on the side to wrap up the two sides of the ' bump up' soupy can't see the battery. I can still fit my bigfeet on either side of the battery and carry my case of BEER! on top of the battery cover. That's why I made it structurally sound.
Dave C. Stout
Dave C. Stout
STOUT PRODUCTIONS
Low Carbon Products
Dave, Thanks again - Question - What is the writing on your schematic, just to the right of the charging ports with the arrow to the line? I think it is a anti-reversing diode, can you explain it alittle or tell me where you got it? THANKS
http://www.futurlec.com/ go here and search "diode" look at the reverse voltage rating and buy accordingly. I get mine from old high voltage sections of old TVs. I mess around with the fly back transformers and use the hi voltage diodes and capacitors to built things.
Dave C. Stout
Dave C. Stout
STOUT PRODUCTIONS
Low Carbon Products
I am seriously thinking about this upgrade. Wondering if it was easy to hook up to existing system? How many miles do you get with a full charge? Thanks in advance,
Jeff
Well I'll tell ya, after getting stopped by da cops two weeks ago I'm really trying to watch my speed. If I keepmy speed hovering around 20 mph +-2 or 3 mph I get an amazing 32 miles per charge with a total altitude climb at over 1000 feet. How's that!! And I haven't riden until the battery went dead so who knows how much further I could go. I will run it 'dry' soon to see just how far I could go. I'm in the process of installing a better current meter and a voltage meter on the dash and I'm going to install some cool 3mm led blue dash lights to light up my dashboard. I'm ripping out the useless 'speedometer' that came with the scooter.
Anyway, the cops stopped me and issued a $10 fine for riding without registration. Even though I had all the paperwork. I got even more info at 'consumer product safty' website. Go here http://www.cpsc.gov/ and in the upper left search box simply type '1512'
That's it and it will list everything related to bicycles and 'low speed electric bikes'. I pleaded NOT guilty and my court date isn't until Sept 19th. I'll keep everyone updated when it comes around.
Dave C. Stout
Dave C. Stout
STOUT PRODUCTIONS
Low Carbon Products
I just got done with those MODs I was telling ya about. the blue dash lights and the two meters, one ampere and one voltage meter.heres some pics.
You just can't see how cool it really is in these pics BUT it looks REALLY COOL!!!
heres some of my head light shots. I dont remember if I uploaded any of these before but here they are.
and here is my solar powered flashing back light. it's a simple multivibrator circuit with two rebel 350mA LEDs.
Of course I still have to paint the rest of the dashboard so you can't see through the clear dash plate.
Enjoy...
Dave C. Stout
Dave C. Stout
STOUT PRODUCTIONS
Low Carbon Products
Heya Dave! At Long Last!! My Yksucess motor is FINALLY installed and running. Wahooooooooooooooo!! Took long enough. After all the broken parts, sheared wires, busted drum housing, then tracing down the new wiring since the colors and number of pairs didn't quite match. (Major project for the electrically challenged like me), it is at least spinning!!! LOL
I'm also going to follow your lead and pull the controller open and make sure all the mosfets have a generous amount of thermal grease. I wound up with an extra wire coming from the speedometer that has no where to connect to on the new controller. Anyone know what voltage or pulse the old controller was sending to it that I might tap into on this new one?
Last detail is finding out why it starts to bind up as I start to even slightly tighten up the axle bolts on it. Must not have a washer somewhere I need to. Anyways great score Dave! Thanks again.
Oh yeah!.. I wanted to ask where you picked up that full twist throttle. I gotta have one of those now too!!
Mike
Mike - Oregon XB-508 with after- market 800watt motor and 72V upgrade
(Thanks to Member tips on V is for Voltage!)
Yeah I had an extra wire for the 'speedometer' too. The speedometer that can with the XB700Li scooter was/is useless anyway. I bought 2 meters as seen in the above pics so I did nothing with the extra wire.
I have listed in this thread I think about the cost and vendor or the 'full twist throttle' which like I said before is only about 90 degrees of movement, so why they call it 'full twist' I don't know.
The binding may be because the inner nut of the axel may be too tight so when you tighten the last nut it binds. The have too be just right so when you tighten the last nut they both tighten to the right torque. It's tough but be careful because you could crack a bearing and then that will ruin the race and the whole assembly. Technically you should have a thin wrench to hold the inner nut so as to not to let then move when tightening the outer nut... Technically, but who has a wrench of that size that thin?
Good luck
DaveC. Stout
Dave C. Stout
STOUT PRODUCTIONS
Low Carbon Products
Yeah the speedometer on the XB550 was worthless too. I hear the 500 is as well. Fine with me, I'm going to take over the dash space anyway like I see you have hehe. The twist throttle I was hoping was a more full range motion than 90 degrees, I misunderstood. And yes I found the binding problem. Apparently a spacing rod or washers was missing that holds the brake drum assembly out and away a bit from the brake pad housing assembly. Now I see even more why the box was all taped up with DHL tape around a gaping hole. Lot of parts were missing. Ah well, back to the hardware store. Good tips though on the tightning and yes I am in need of a wrench that size that thin too!
Should be ready to ride after the final washers though! heh heh heh. I've been stopped by cops twice so far with the old motor with mods. Wait till they see me now! Hah
Mike
Mike - Oregon XB-508 with after- market 800watt motor and 72V upgrade
(Thanks to Member tips on V is for Voltage!)
I have been riding the new motor for the last week now, rock solid even in the heat, and the performance is great! The speed is very similar to what I was getting with the stock 550 watt motor ramped up to 72 volts, yet doing it at 48 volts. The torque is a little better than the old one though. Next project is to ramp this one up to 72 volts also. I rode the old one every day for a year at 72v so I know they can handle it fine. The performance will be amazing I am sure.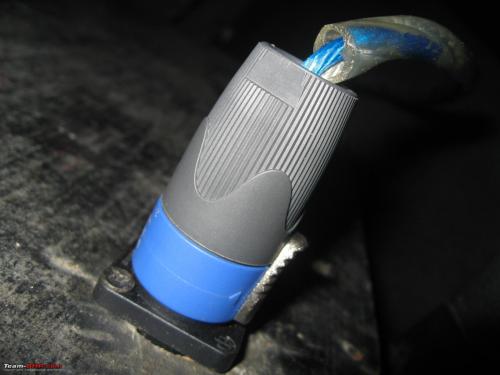
I could not find any washers anywhere the right size to replace to missing spacer in the brake drum assembly. I decided to just cut some pipe to the right length, yet no plumbing or electrical pipe was a good fit, all were sloppy. I got lucky in the picture framing dept at home depot, there were 2 sizes of square pipe and 2 sizes of round pipe, and one of them happened to be a perfect fit. Steel no less! Then, in order to be able to use the correct amount of washers on the axle to be able to tighten the wheel on the forks without binding as I was having problems with, it turned out I needed about a 1/4 inch more space between the forks in order to do so. In asking around a friend loaned me his 10 ton hydraulic "puller" (it's more a spreader really) he uses for car body repair to spread the forks. Sounds big but its actually a small unit about 2 feet long and about 4 inches wide. But plenty strong to spread those steel forks! I highly recommend it to any XB series owners that go for this upgrade that end up needing a little more space. I'm sure rental yards have them.
I didnt want to starve this motor for current so I rewired the bike from the batteries to each other and then to the controller with 10 gauge wire and connectors, because the innards of most connectors and fuse holders are pathetic and the actual surface area that makes contact inside, reduces your connection to about a 22 gauge effectively. And your battery supply current is only as good as the weakest link in the chain. So going through 10 gauge connectors get me back up to the 12g which is the largest on the controller.
I put Neutrik 4 wire 40amp power lock connectors on the battery cables, so switching from bike to battery charger is a snap, and no annoying zap when the batteries connect! They just slide in and then a 1/4 turn to the right till you hear a small click. I put their 8 wire connector on the motor cable, so removing the wheel for flat repair is now one quick twist.
Once again Dave thanks for the great find! I recommend this motor to anyone with any XB series bike. Just plug it in with the standard 48 volts your bike came with, and you will see a major improvement in performance! Personally I am going to run it at 72 volts and am sure it will go like a bat out of hell.
Mike - Oregon XB-508 with after- market 800watt motor and 72V upgrade
(Thanks to Member tips on V is for Voltage!)
Pages