
I've had an XB-600 for almost a year now and have been modifying it since I got it. However I never really went searching for relevant forums until now, so I'm new to everything here.
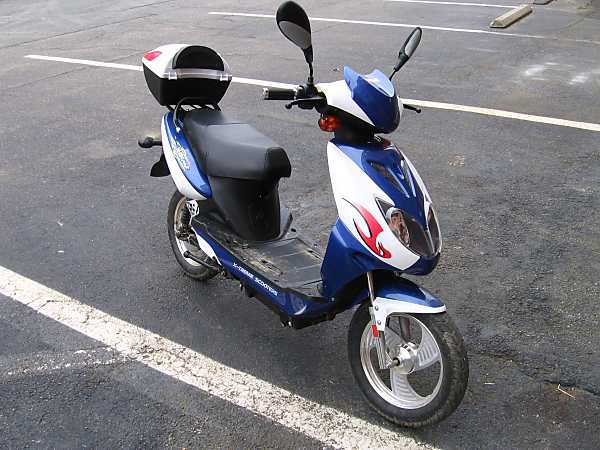
Photo from November 07
Modification #1
The first problem I had with it was that the fuse for the 12Volt system kept blowing out really easily whenever the scooter drove in even a light drizzle.
And the fuse in question was shoved up into the middle of the front wheel well and had to be changed blind with one hand. I moved the fused up into the center console area to make it easier to replace.
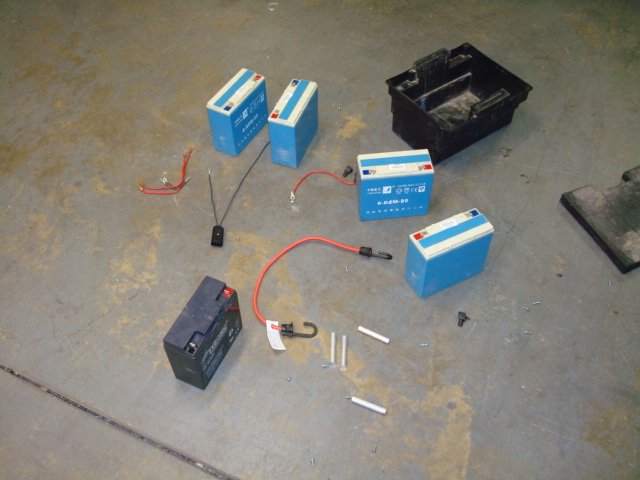
I later traced the short to the exposed connectors in the rear wheel well. So I bundled them together and sealed them into a modified rubbermaid container.
Modification #2
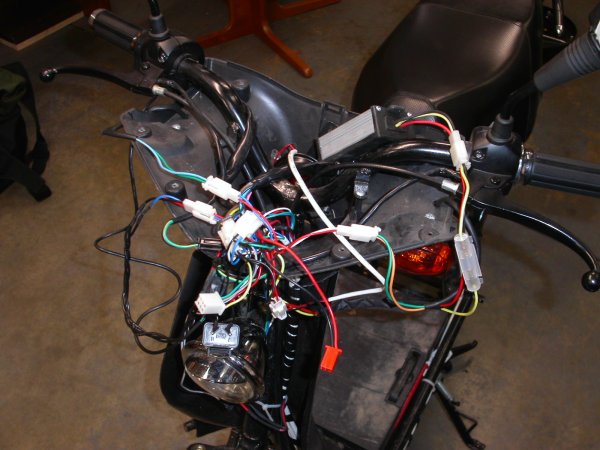
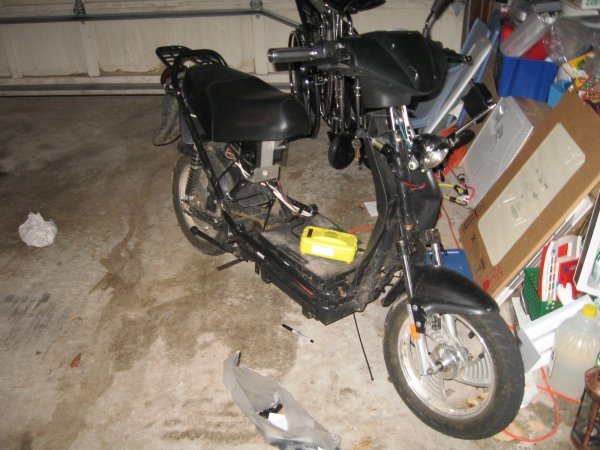
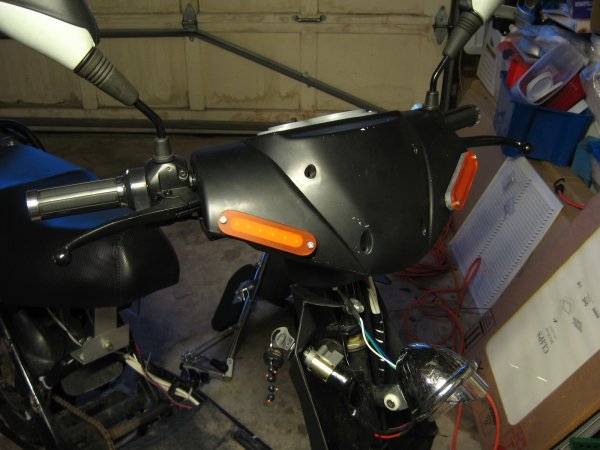
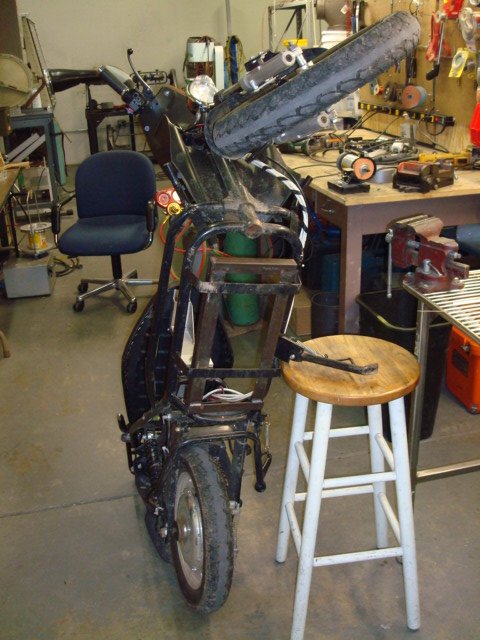
Not wanting to be mistaken for a normal scooter again and being unhappy with the location of the fuse I end up removing all of the cosmetic body panels. I relocated the charger receptacle and motor controller to the seat bucket, replaced the stock headlights with a single headlight on a custom bracket, trimmed the rear mud guard, and cut down the back of the front column. Couldn't get rid of it completely because it also acts as a mud guard.
I also relocated the horn, fuse, and all of the excess wiring from the front column into the dash clamshell, which was surprisingly empty. While doing this I found a single gray wire that connects to the speedometer. When connected it limits your top speed to 20mph in order to comply with the Federal law. When disconnected your top speed can reach up to 26mph on a slight downgrade.
It could be wired to a switch, but I just leave it disconnected. :D

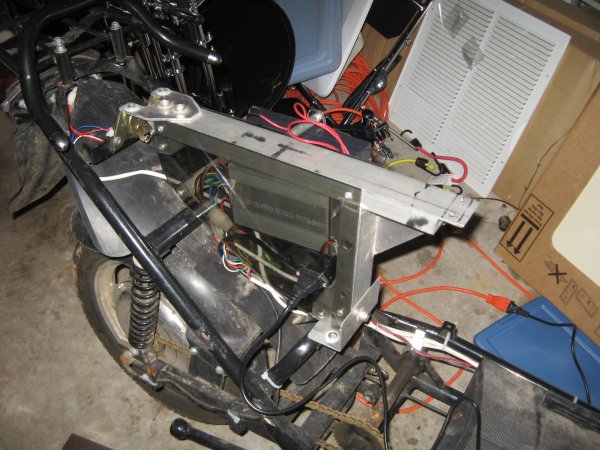
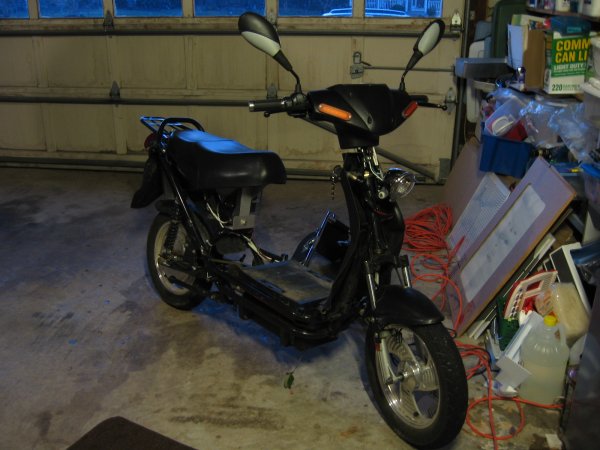
Photo from March 08
In September after several months of commuting back-and-forth the underside of the seat bucket broke open and the seat was no longer firmly attached to the frame. I went about replacing the seat bucket by making a bolt-on frame extension out of scrap aluminum found at work. Then secured and enclosed the controller, cabling, and charger receptacle using 1/8" polycarbonate sheets.
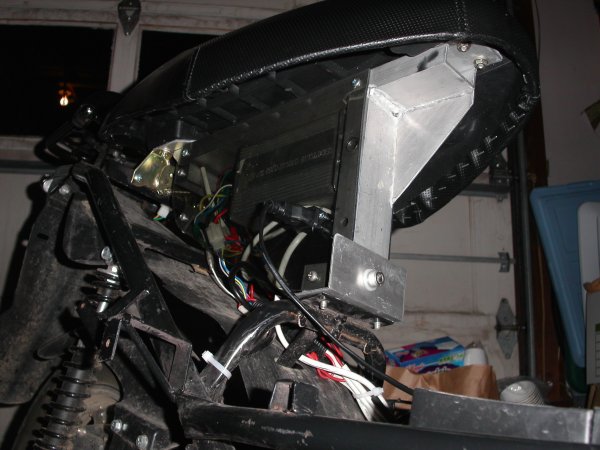
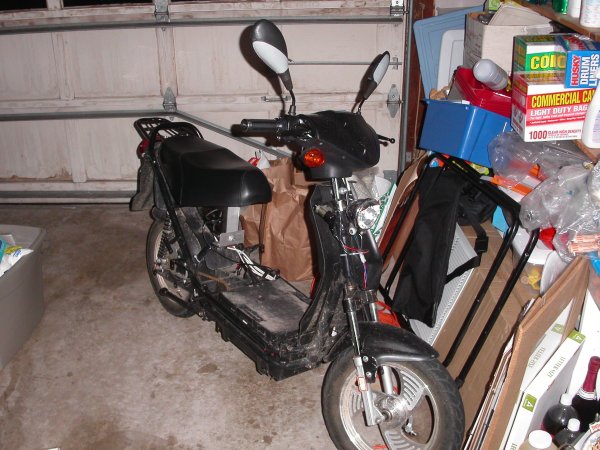
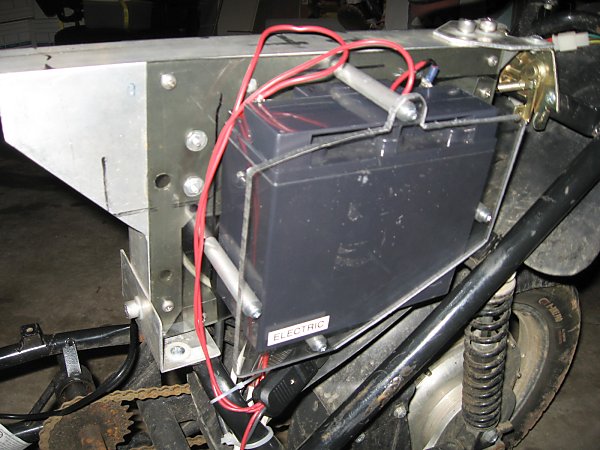
Photo from September 08
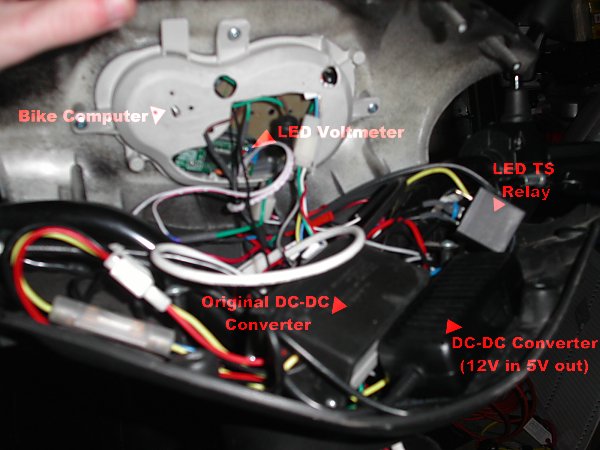
This past week I've been tearing apart the dash with the intent to replace all the incandescent bulbs with LEDs, but I'm thinking that I'll probable just ditch the original speedometer and voltmeter since I will be upgrading to a 60V system as well as installing a bike computer and a red segment LED voltmeter.
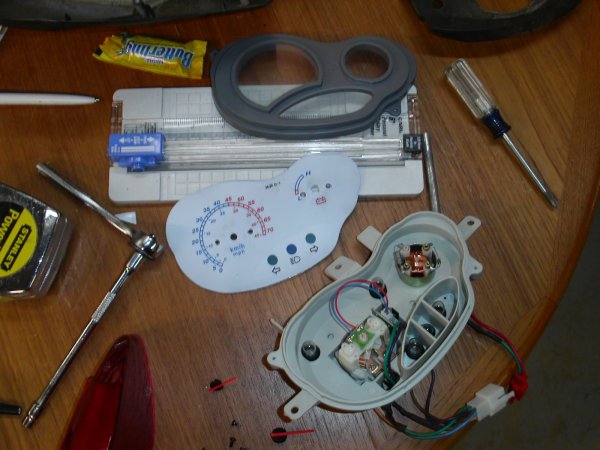
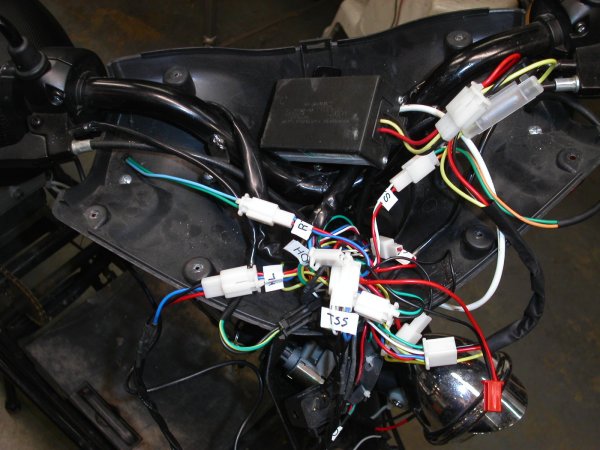
In preparation for that I started cleaning up some of the wiring and labeling all of the connectors.
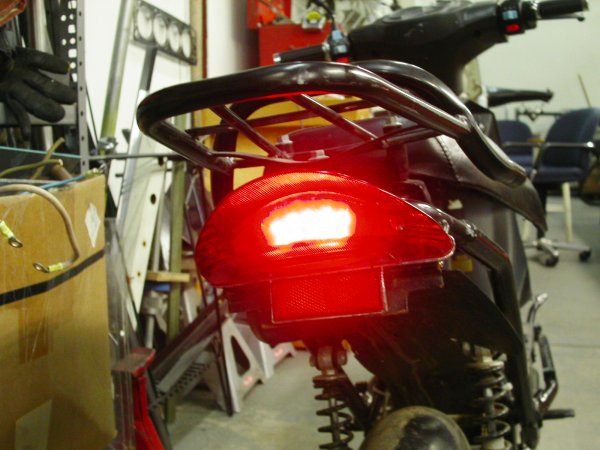
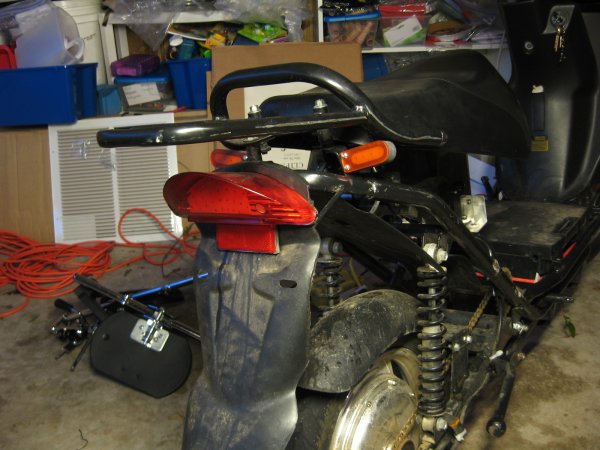
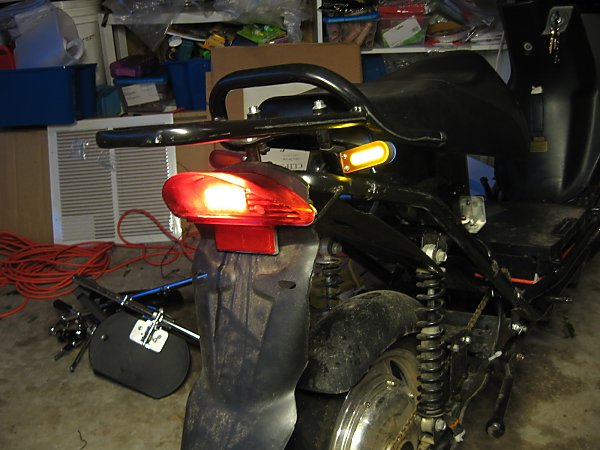
Just yesterday I finished replacing the brake light with a custom LED array.
I cut a sheet of polyethylene sheet to fit the reflector area for the old bulb, then drill holes in a spacing pattern. I then soldered one resistor onto each positive LED leg and each negative leg to a common ground for each mode set.
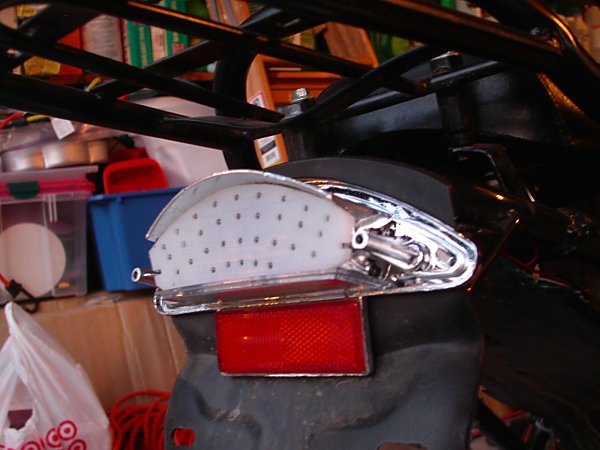
The result is just as bright as the original bulb, albeit slightly more directional in focus.
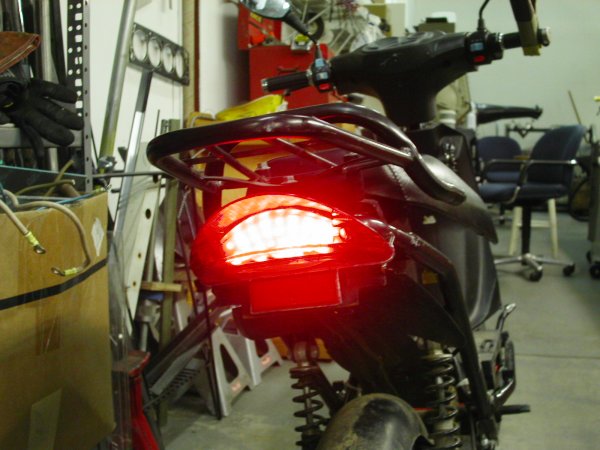
The array of 32 red 3mm ultrabright LEDs consumes 9.6 / 3 watts instead of the original 21 / 5 watts.
As can also be seen in the above photos, I used an angle grinder to shave off the steel tabs on the frame that were used to secure the body panels.
I would like to replace the turn signals with LEDs as well, but I will have to replace the stock relay first.


Captainslug,
Impressive I must say.
While you are at it, don't forget the shunt mod, which improves acceleration up minor grades substantially. I have done that, and upgraded to 60 volts, and find the XB-600 much more enjoyable to ride.
I guess I am wondering if there are any implications about doing the 60 volt mod after running your current set of batteries for a year. Does your 48 volt pack still seem to have full capacity after a year? How far do you ride your XB-600 a day? When do you charge it? I only ride about 5 miles total a day, and I charge every evening. Come to think of it, I guess that adding a new battery to a set of older batteries just means the new one won't run down as quickly as long as it is the same capacity as the original batteries.
This is also the first mention I have heard of a "gray wire" on an XB-600, though I have heard mention of such on the XB-700Li. I wonder if your XB-600, being manufactured somewhat earlier than most on this board might use a different controller.
Anyway, thanks for the post and pics. It is great to see another brave soul paving the way for some of us later comers.
Tom
Captainslug,
I'm guessing that your work is somewhat mechanical. You're quite lucky to have easy access to scrap stock and the appropriate tools. In any case, you mentioned replacing the speedo panel and mentioned that you wanted a voltgage meter that would accurately read 60V. I noticed that the voltmeter on the XB-600 can be modified fairly simply to accurately report the state of charge on a 60V battery system. From what I noticed, the voltmeter is simply a meter with an extra resistor next to it working as a voltage divider. More than likely, you just need to swap the dividing resistor with something higher for 60V. I've been meaning to calculate the exact numbers or at least trial and error it with a potentiometer but haven't had time recently.
Also, i was considering replacing all of my incandescents with LEDs at one point, but decided that the power savings really weren't worth the effort. Out of curiosity, what is the driving factor in your case? I realize that they would lower power consumption (a tad), reduce the weight of the vehicle (again, just a tad), be more reliable, and perhaps even brighter, but I could never rationalize all the effort to replace them.
I will be doing the shunt mod later this week.
My average daily round trip is 6 miles and I charge it back to 100% every evening.
After a full year of use the batteries have not shown any noticeable decline in output and are supplying 52 volts on a full charge.
The gray wire is what others have added a "turbo" switch to. It limits the maximum report of the throttle to the controller. Mine was apparently left disconnected before being packaged and shipped to me.
I've already ordered a cheap segment LED display and I intend to use it to replace the stock voltmeter.
And yes doing the LED replacement will only shave off a couple dozen watts total. I'm mostly doing it to have the peace of mind of having extremely long-lasting lights. And to try and make the turn signal placement a good deal more effective.
Just performed the shunt modification. The acceleration seems a bit better, but I won't be able to tell if if made a noticeable difference until after I install a bike computer.
The shunt mod, at least on mine only increased the acceleration (torque) , not the top speed. It helped with climbing minor grades noticeably quicker.
Tom
Had to ride home in the wet again. And I forgot to put my camera in my bag before leaving so I didn't take any in-progress shots unfortunately.
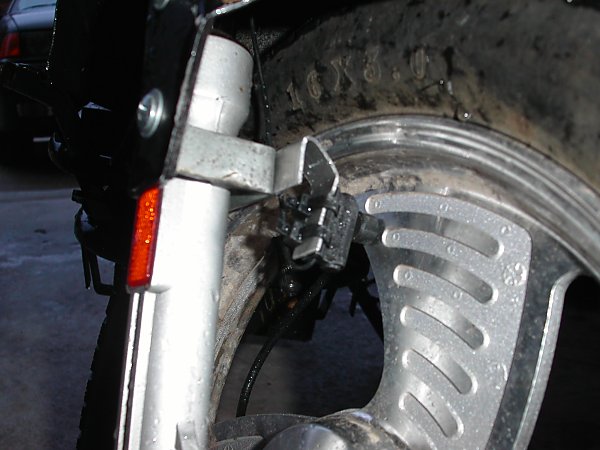
I took the front wheel off the front fork and made a bracket out of sheet aluminum to hold the sensor. I then drilled and tapped a hole to screw the magnet into.
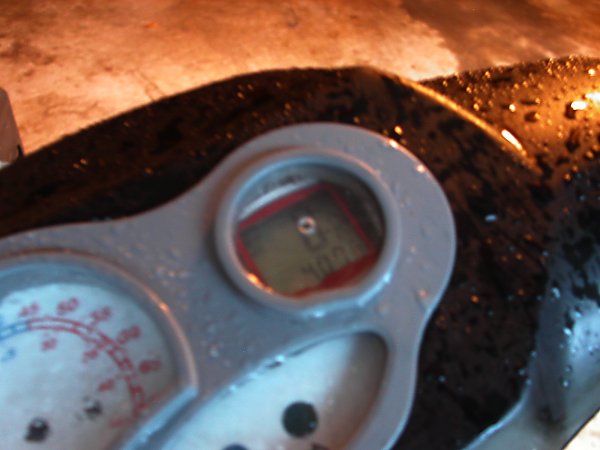
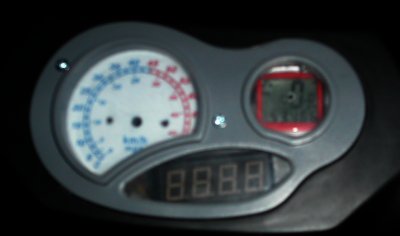
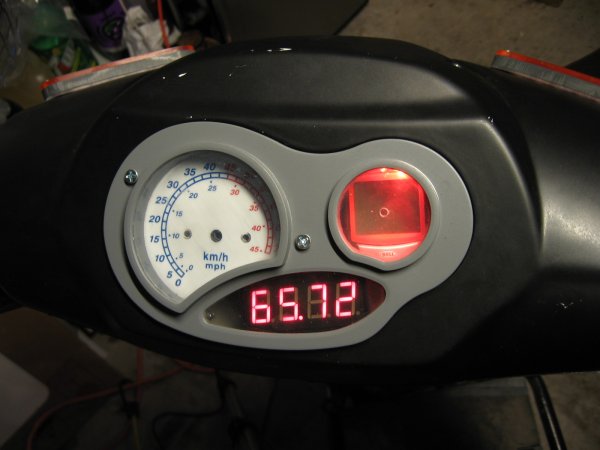
Since the bike computer turns itself on and off I don't really need free access to its buttons all the time. So I installed it into the gauge console where the voltmeter used to be.
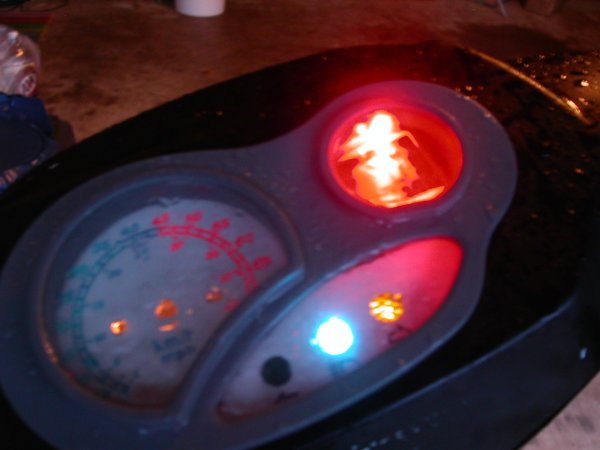
I soldered leads onto the contacts of one of the panel illumination bulbs and wired in some red LEDs to illuminate the bike computer since it lacks it's own backlight. I also replaced the indicator bulbs with LEDs by simply adding a resistor to them, heat-shrinking the resistor, then wedging the LED into the original socket.
After measuring the wheel radius with me sitting on the bike and then inputing the circumference from that measurement, my top speed on level ground is displaying at 19.5mph. The stock speedometer was optimistically off by about 4mph.
I just hooked my bike computer up this weekend. I put it to the right of the instrument panel. I think i might even have the same bike computer (its a Schwinn something or another, aka the cheapest one on Amazon.com). It actually has a backlight but you have to hold down one of the two bottom buttons to temporarily activate it (at least I haven't played with it enough to figure out how to get it to stay on longer).
Since nobody has answered my post in the other thread... what did you use for the tire circumference since you seem to have measured it under weight?
I entered 1396mm as the circumference based on my measurements of the front wheel. The Bike computer I installed is made by Bell and was purchased at Target for $10.
Got quite a bit done today.


Here's a better look underneath the seat at the frame bar I made to replace the seat bucket.
Adapter plate that secures the frame bar to the old seat latch.
Machine some 3-inch aluminum spacers and a side plate to hold the 5th battery in place. I then wired an IEC320 extension inbetween the 48v pack and the motor controller power input.
The 60V charger to replace the 48V one.
I still need to add replacement turn signals.
I ran some tests prior to starting to charge the 5th battery so these speeds represent a running voltage that's likely lower than that of a fully charge set of batteries.
New top speed on level ground @ 62.5 volts: 23 mph
Old top speed on level ground: 18mph
New top speed downhill: 29mph
Old top downhill: 24 mph
Better than the top speed is the shorter acceleration curve and the improvement in hill climbing ability. Even when climbing steep hills that used to lower my speed to 9mph, I'm now climbing them all at 16mph.
Will update with a finalized list of speeds tomorrow.
Where did you get your 60V charger?
I bought the 60 Volt Charger PC Style Plug FAN COOLED! charger from TNC Scooters.
I just finished some more extensive reworking of the gauge panel.
+ Ground off the excess plastic from the gauge console bucket to make room for the new parts
+ Rewired the turn signal indicator LEDs
+ Replaced the turn signal relay with one made specifically for LED turn signals
+ Wired in a dc-dc converter for the led segment display voltmeter
+ Made a mounting plate for the voltmeter and original speedometer face
I'll take more pictures of the work I did inside tomorrow, because right now I'm really tired of opening and closing the center console.


I might still have space to put the original speedometer back in.
What brand batteries are you guys using? Do these use Greensavers as OEM?
Nice work! Phil
I'm not sure what brand the factory batteries are because I haven't torn into the original pack yet (will probably be replacing them in January). They're probably a generic Chinese brand.
The fifth battery I just added is a Tysonic 12v 20ah I order from: http://www.electricvehiclesusa.com/product_p/ba-ty-12-20.htm
Dickey_b, thoughts? Will this work for me?
Tonight I started machining parts to make LED turn signals because I don't like any of the after-market ones. I will be using ultra-bright white LEDs through fluorescent orange acrylic lenses.

With the ignition off you should be able to measure your battery set voltage from the charge receptacle using a voltmeter.
The replacement charger does not have the circuitry to detect if the ignition is on or off so make sure to double-check that your scooter is turned off before plugging in the charger.
Yes, and I think I will buy one of these chargers for myself. That will allow me to leave my battery pack connected, and charge my entire pack, including the extra battery just by plugging the charger into the normal charger socket.
Dickey_b
Waste Not, Want Not
It would be a lot more convenient to have a 60V charger.
Quick question: Can you check if your fifth battery fits in the compartment that's under the seat?
Also I was wondering what the little square device is in your dash( next the the speedometer)? is that an accurate speedometer by any chance? Just curious/dumb...
Cheers, Swimzilian
1. 12V 20ah battery is 7 x 3 x 6.5 inches. I'm pretty sure it will fit in the original seat compartment, but I don't have it anymore in order to measure. When I eventually upgrade to 72 Volts I will be cutting out the axle for the pedal assist and making a battery box large enough to house all 6 of the 12V 20AH batteries where the original box was.
2. It's a bike computer. I cut a pass-through hole and bolted the base of the unit to the inside of the original gauge housing.
The wiring is kind of a mess, but at least I have everything labeled at each connector.
Actually, depetro, the resistor of which you speak is actually a zener diode, which has a fixed drop of around 40 volts. (I haven't measured it, but that's approximate) So the meter will read zero when the pack voltage gets down to 40 volts, and full scale at 48 volts or more. Replacing the zener diode with a 50 volt zener would be the proper way to re-calibrate the battery level meter for a 60V pack. check out my detailed picture on my website at:
http://www.bergerweb.net/xb500/repairs.shtml
Dickey_b
Waste Not, Want Not
Dickey_b,
You're right there is a diode there. However (at least on my bike) there is a big honking resistor on that meter too. I don't have the exact value but I think it was 72 ohm. It's also a fairly large resistor (about the size of a 1W) so my line of thinking was that the resistor was part of a voltage divider and the diode just prevented current from flowing in the wrong direction. I haven't had a chance to attempt any mods or further research because of a variety of factors, predominantly attempting to secure my bike from the local thief who seems rather resolute to steal my bike from the carport where I park it each night.
My plan was to desolder the resistor, put a pot in there and use my bench power supply to just trial and error it a bit.
This is probably the wrong place to post this (wrong topic) but it appears the author of this thread is *very* knowledgeable about the XB-600 and it's electrical system.
Here's the breakdown...
Battery pack DISconnected/30 amp fuse in fuse holder: I try and reconnect the battery pack and the battery connector ARCS bright blue, melts the metal of the prongs but the fuse does not blow.
Battery pack CONNECTED/30 amp fuse REMOVED from fuse holder: Battery pack can be connected with no problem. Try to slip the fuse into the holder and the fuse ARCS bright blue and melts the ends but the INTERNAL FUSE does NOT blow.
Why would this be happening?? Thanks for any insight...
When you connect the battery the capacitors in the controller end up drawing some current, and that's why the connector arcs. It's not going to arc enough to cause any significant damage, and the batteries shouldn't be able to deliver more than 30amps unless they are faulty, so the fuse us primarily there to protect the rest of the bike's circuitry should the batteries deliver more than the circuit is designed to handle.
Hooray! Finished making my replacement LED turn signals. Turns out the original turn signal relay CANNOT be replaced with a standard automotive type. So I ended up desoldering the annoying speaker from the original one and putting it back in.
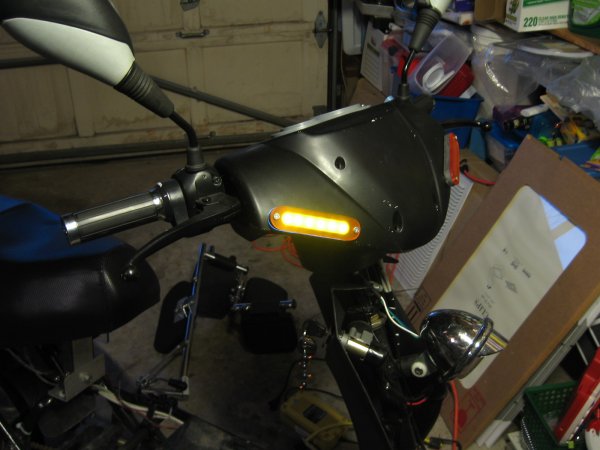
Arrays of ultrabright 3mm white LEDs mounted in white polyethylene behind fluorescent amber acrylic.
I was using a tripod and a handheld light this time so the photos turned out much better.
Tomorrow I will be using an angle grinder to cut the bike pedal axle off.
Video of the turn signal
http://www.youtube.com/watch?v=-FiHqDC-XAU
I don't know where you got that idea. The typical Lead Acid batteries can output way more than 30-amps. Here is a typical 12-volt 12AH Battery Specification Sheet, please note this battery can output 180-amps for at least 5 seconds. That is long enough to cause considerable damage. Please take care, these are not D cells for your flashlight and can kill.
On another note, I really like the lights you have created. I had a similar idea but I like your much better. Can you post a wiring diagram with the resistor values you used to get them to work and at what voltage you are using?
Thanks,
Grandpa Chas S.
I'm again making it obvious that I need to study basic electrical engineering. I only know enough to make extremely basic circuits while not killing myself.
The current turn signals were wired in as direct replacement for the original turn signals. The DC-DC converter output doesn't drift significantly so I don't have to worry about it supplying more power than the LEDs and resistors could handle.
I ordered a set of 50 ultrabright white LED from Chi-Wing LED Product shop.
http://stores.ebay.com/Chi-Wing-LED-product-shop_LED_W0QQcolZ2QQdirZQ2d1QQftidZ2QQtZkm
Just keep an eye out for the listings that include 470ohm resistors, which is what I ended up using with one resister per LED in parallel.

If you want to make some exactly like mine, here are the machining templates I made.
http://www.captainslug.com/temp/turnsignals.doc (45kb)
Simply print that file out on full-sheet label paper, apply to the plastic sheets, drill the holes, then cut the parts to size.
I used UNC #6-32 screws to put mine together so the through-holes are 5/32" and the holes I later tapped were drilled to 7/64". I used only 3mm LEDs so the polyethylene parts used to hold the LEDs were drilled with a 1/8" bit. I tend to buy most of my plastics either locally as scrap, or through McMaster-Carr.
I'm currently researching parts to make an LED replacement headlight that will output 400 lumens at only 8-1/2 watts.
Thanks for the templates, they look great. I think I may have to break in my new milling table I bought to use with my drill press to make some of these.
Thanks again,
Grandpa Chas S.
Ordered the parts to make an all-LED headlight.


The 435 lumen 8.5 watt "high-beam" will be a white Luxeon Endor Rebel Tri-Emitter with a 25degree lens.
The 144 lumen 7 watt "low-beam" will be a ring-shaped array of 24 6000mcd white LEDs.
I'm going to be replacing the headlight fixture while I'm at it because the current one was picked out kind of hastily. Chrome doesn't match the rest of the scooter at all now.
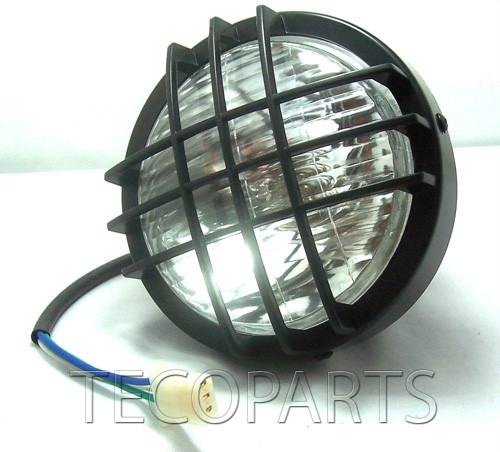
Flat black on the other hand does.
Well today certainly was a mixed bag. First I cut off the axle, chain, and bushings for the pedal assist. I then took apart the original battery box.
I made a battery tray out of scrap steel, and then proceeded to weld it to the frame.
However, I had neglected to remove the controller from the frame. So after I got the batteries strapped in and wired together the bike no longer turns on. The controller was killed by the welding current passing through the frame.
I'll have to order a replacement controller, install it, and then see if the DC-DC converters are dead too.
Pages